Thanksgiving is the perfect time to bring a little creativity and gratitude into the kindergarten classroom! I’ll never forget a few years back when one of my students proudly turned a simple paper plate into a “superhero turkey”—complete with a crayon cape.
These 8 easy Thanksgiving projects for kindergarten, from colorful turkey crafts to meaningful gratitude activities, keep little hands busy and hearts engaged. So grab some paper, glue, and a sprinkle of fall magic—let’s dive into these memorable Thanksgiving crafting ideas!
Here below are the 8 projects…
- Fruit and Veggie Turkey Snack Plate
- Feather Garland
- Pom-Pom Corn on the Cob
- Gratitude Sunflower
- Turkey Feet Stamps
- Thanksgiving Story Bracelets
- Harvest Basket Collage
- Paper Bag Thankful Books
I picked up the Scissors Bulk Set of 25 recently, and let me tell you, it’s been a total game-changer for all our holiday crafting projects with the kids! These scissors are sharp, cut like a dream, and the soft-grip handles make them super comfortable for little hands too. With 25 pairs, I don’t have to chase down a pair every time we need one for a Thanksgiving craft (which, with kids, is pretty much constant!), and I can stash a few in each room just to be ready. No wonder thousands of teachers, parents, and homemakers buy these every month—they’re just that handy for projects like turkey handprints, paper pumpkins, and everything else we’ve been making. The only small thing is they’re best for lighter stuff like paper and cardboard, so they’re not ideal for heavy-duty materials, but for all our day-to-day crafts? These are spot-on and totally worth it!
Fruit and Veggie Turkey Snack Plate
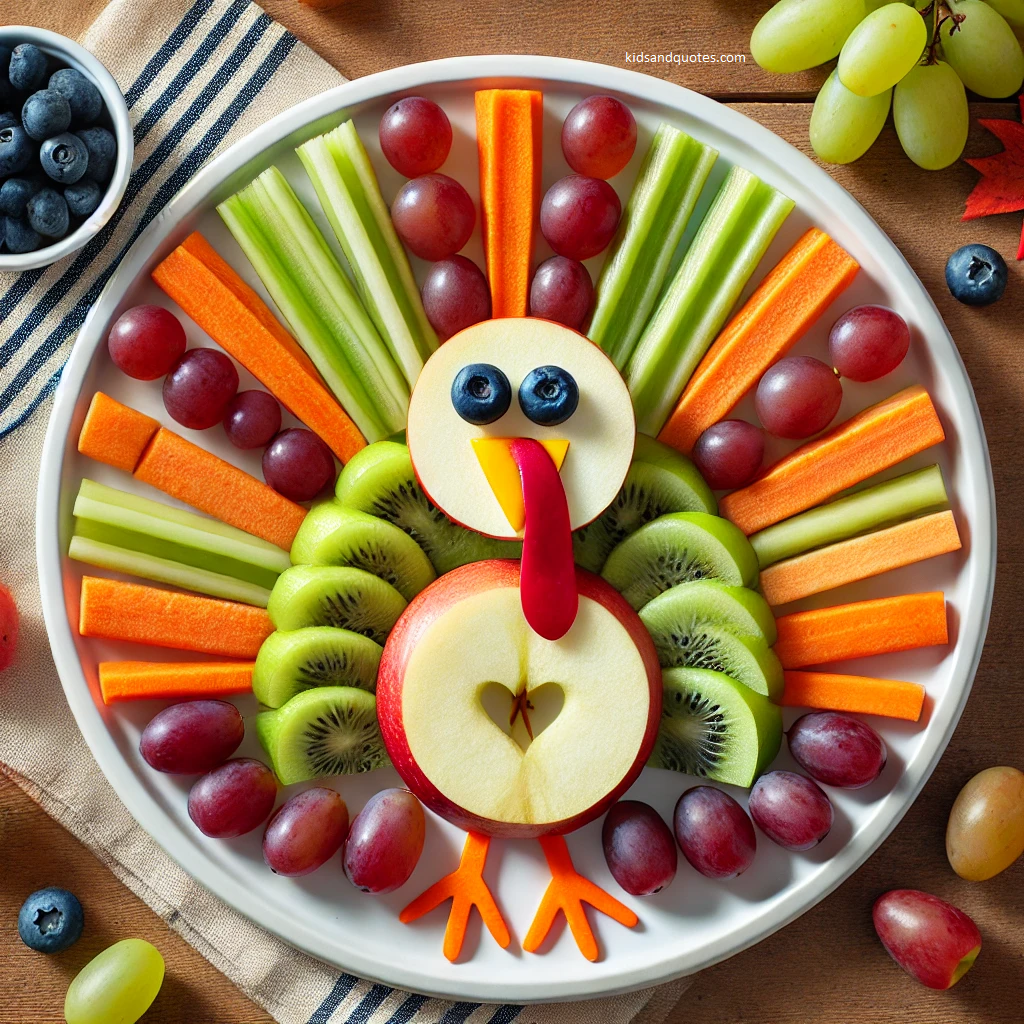
Looking for a healthy, fun Thanksgiving snack that’s as cute as it is tasty? This Fruit and Veggie Turkey Snack Plate will have kids giggling and munching in no time. It’s a fantastic way to sneak some fruits and veggies onto their plates, all while celebrating Thanksgiving with a colorful, edible turkey!
Materials
- A large plate
- Carrot sticks
- Celery sticks
- Red and green grapes
- Apple slices
- Blueberries (for eyes)
- Raisins or mini chocolate chips (for details)
Steps
- Create the Turkey’s body: Place a round apple slice in the center of the plate to be the turkey’s body. This is the base for our cute little turkey!
- Add the feathers: Arrange carrot and celery sticks, along with grapes, fanning out from the apple slice to make colorful “feathers.” Let the kids decide on the pattern—every turkey can look a little different!
- Make the face: Place two blueberries near the top of the apple slice as eyes, using a dab of peanut butter or cream cheese if they need help sticking.
- Add finishing touches: Use a small raisin or mini chocolate chip for the beak, and maybe even a grape slice for a gobble if you like!
- Enjoy: Now it’s time to gobble up this adorable and healthy turkey snack!
This activity not only lets kids practice fine motor skills, but it’s also a healthy treat they’ll love to make—and eat!
Feather Garland
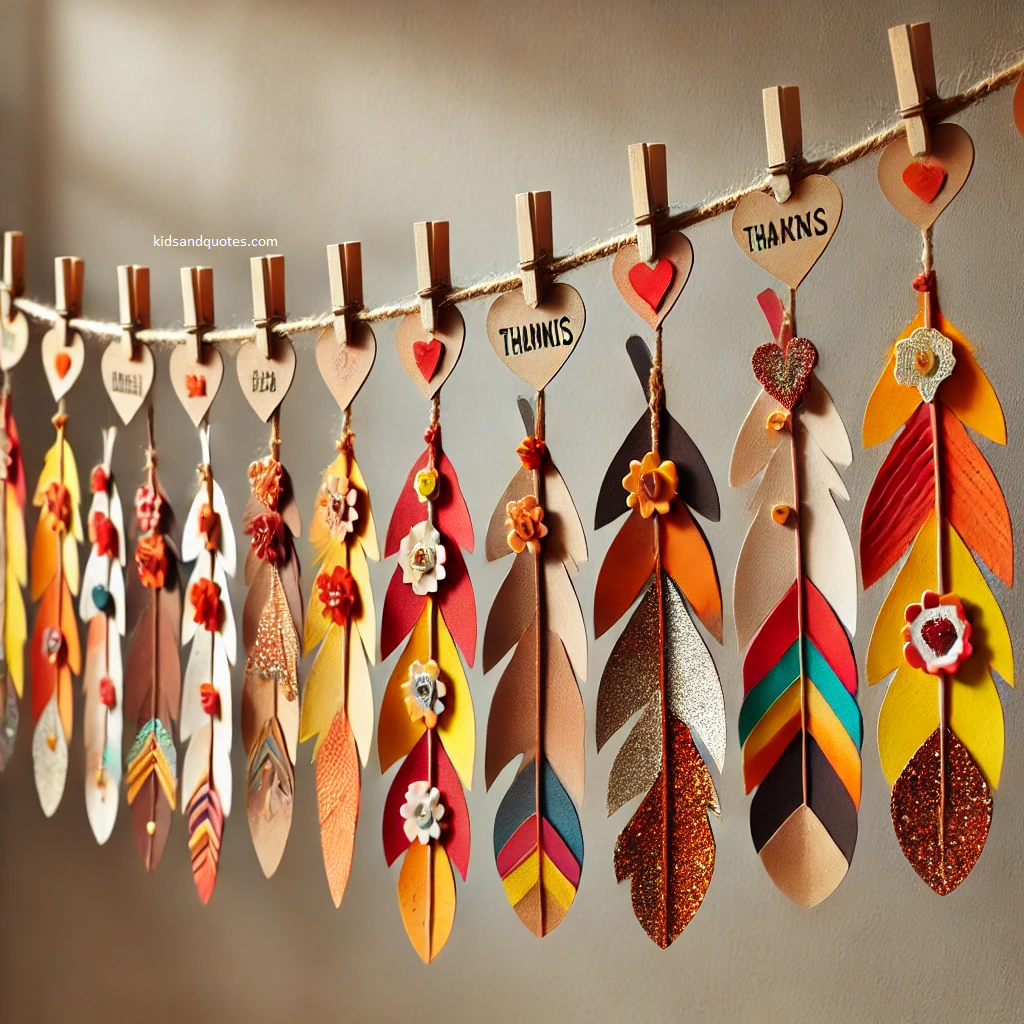
Let’s add a splash of color to our classroom with a Feather Garland! This craft lets kids use their creativity to decorate bright paper feathers and string them into a beautiful, festive decoration. It’s perfect for bringing a touch of Thanksgiving spirit to any space!
Materials
- Colored construction paper (in fall colors like orange, red, yellow, brown)
- Scissors
- Glitter, stickers, and crayons
- Hole punch
- Yarn or string
Steps
- Cut out the feathers: Start by helping kids cut feather shapes out of construction paper. Each child can pick out colors they like, and each feather will add to the garland’s unique look.
- Decorate the feathers: Here comes the fun part! Give the kids crayons, glitter, and stickers, and let them decorate each feather however they want. Encourage them to make each one as colorful or sparkly as they like.
- Punch a hole: Once decorated, punch a hole at the top of each feather. This will make it easy to string them onto the garland.
- String the feathers together: Help kids thread each feather onto a piece of yarn or string, arranging them in a colorful pattern. Space the feathers out so they fan nicely along the garland.
- Hang up and enjoy: Now it’s time to hang the feather garland in the classroom! Let kids admire their work and enjoy the bright, festive decoration they created together.
This garland is not only a fun Thanksgiving craft but also a wonderful way for kids to show off their creativity and work together on a shared project.
Pom-pom corn on the cob
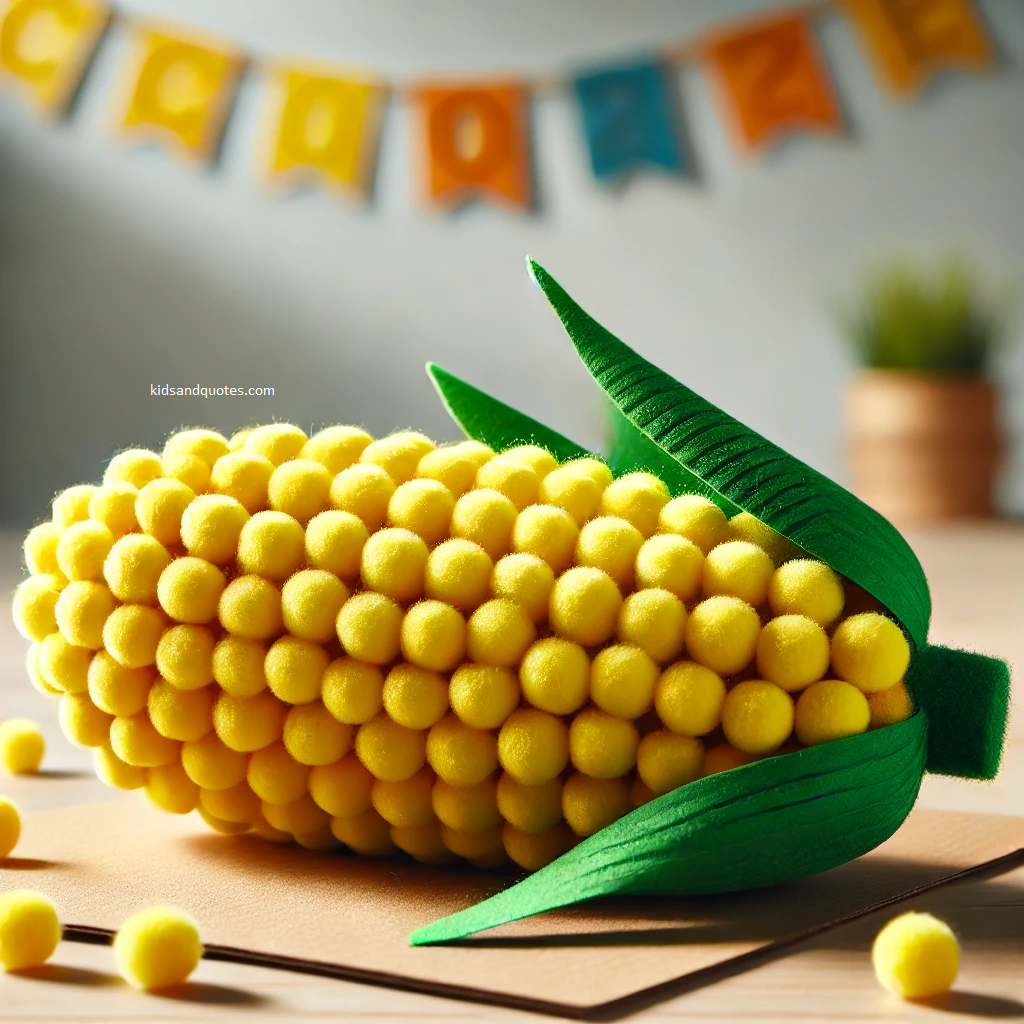
Here’s a fun, hands-on craft that kids will love—Pom-Pom Corn on the Cob! This little project uses soft, colorful pom-poms to make cute “corn” that looks just like fall’s golden harvest. It’s perfect for little hands and brings a touch of Thanksgiving charm to any classroom display.
Materials
- Yellow pom-poms (small or medium size)
- Green construction paper
- Cardstock or cardboard (for the cob shape)
- Glue
- Scissors
Steps
- Cut out the cob shape: Begin by cutting a corn cob shape out of cardstock or cardboard. This will be the base for the pom-poms and give it a sturdy structure.
- Glue on the Pom-Poms: Have the kids glue yellow pom-poms all over the cob shape until it’s fully covered. Encourage them to place them close together so the “corn” looks nice and full.
- Add the husks: Cut long, leaf-shaped pieces from the green construction paper. These will be the husks! Glue them at the sides of the cob, so they frame the pom-poms like real corn husks.
- Let it dry and display: Allow the glue to dry completely. Once ready, the kids can proudly display their “corn on the cob” as part of a Thanksgiving wall display or take them home to share with family!
This craft is a great way to let kids explore textures while creating their own fall harvest masterpiece!
Gratitude Sunflower
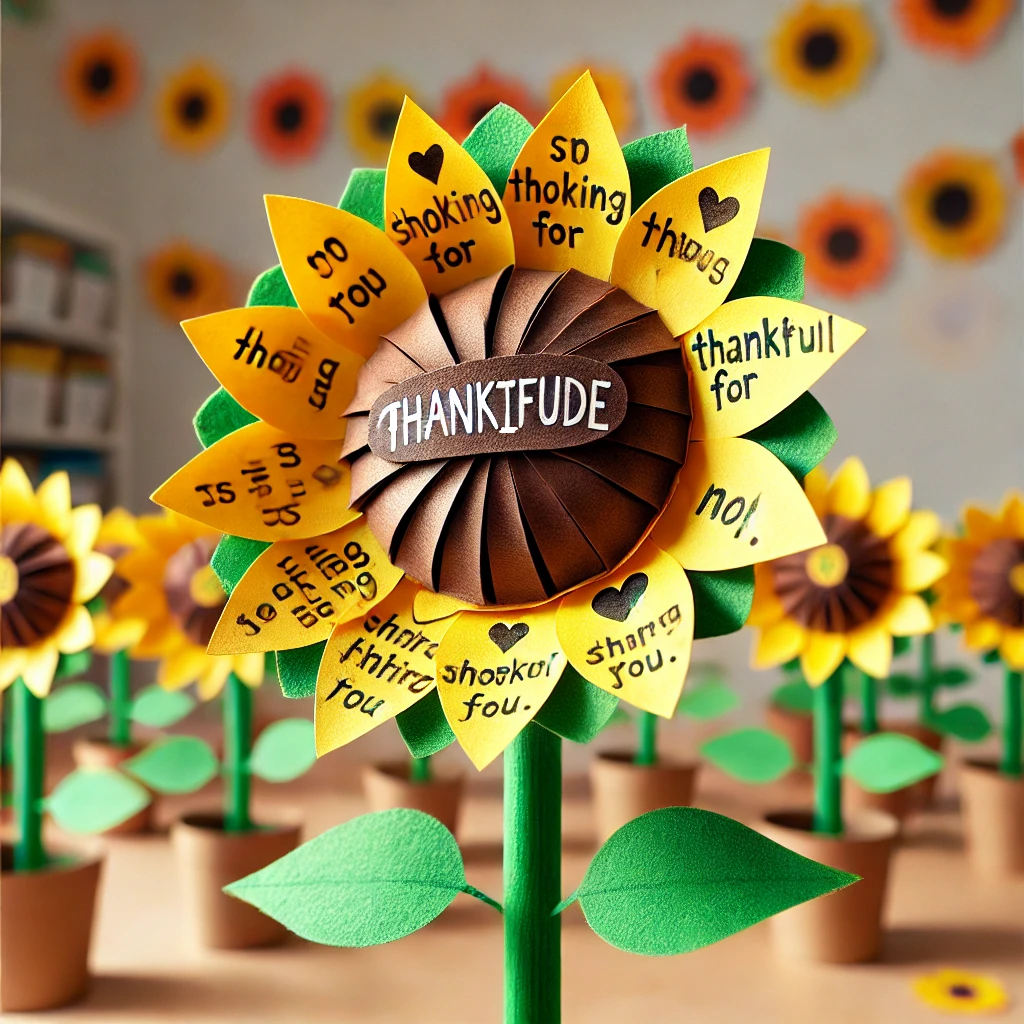
Isn’t creating a Gratitude Sunflower just the sweetest way to celebrate Thanksgiving? This activity gives kids a chance to pause and really think about what they’re thankful for—and then share it in such a colorful, hands-on way! Each child gets to make their very own sunflower, adding “thankful petals” one by one, transforming the whole classroom into a gorgeous “garden of gratitude” that everyone can admire and enjoy.
Materials
- Yellow and brown construction paper
- Scissors
- Glue
- Markers or crayons
- Popsicle sticks or green construction paper (for stems)
Steps
- Cut out the sunflower parts: Start by helping kids cut out a large circle from the brown paper for the center of the sunflower. Then, cut several petal shapes from the yellow paper. Each child should have enough petals to write a few things they’re thankful for.
- Write on the petals: Give each child a few petals and ask them to think about things they’re thankful for. Have them write or draw these on the petals with markers or crayons. This step brings out their unique ideas and makes each sunflower special.
- Assemble the sunflower: Glue the petals around the brown center circle to form the sunflower shape. Each petal, with a note of gratitude, fans out beautifully.
- Add the stem: Attach a popsicle stick or a strip of green construction paper to the bottom of the flower for a stem.
- Create a garden display: Once everyone’s sunflowers are ready, display them on a bulletin board or classroom wall to create a lovely “garden of gratitude” that everyone can admire.
This craft is a wonderful way to teach kids about thankfulness and share positivity around the classroom!
Turkey Feetstamps
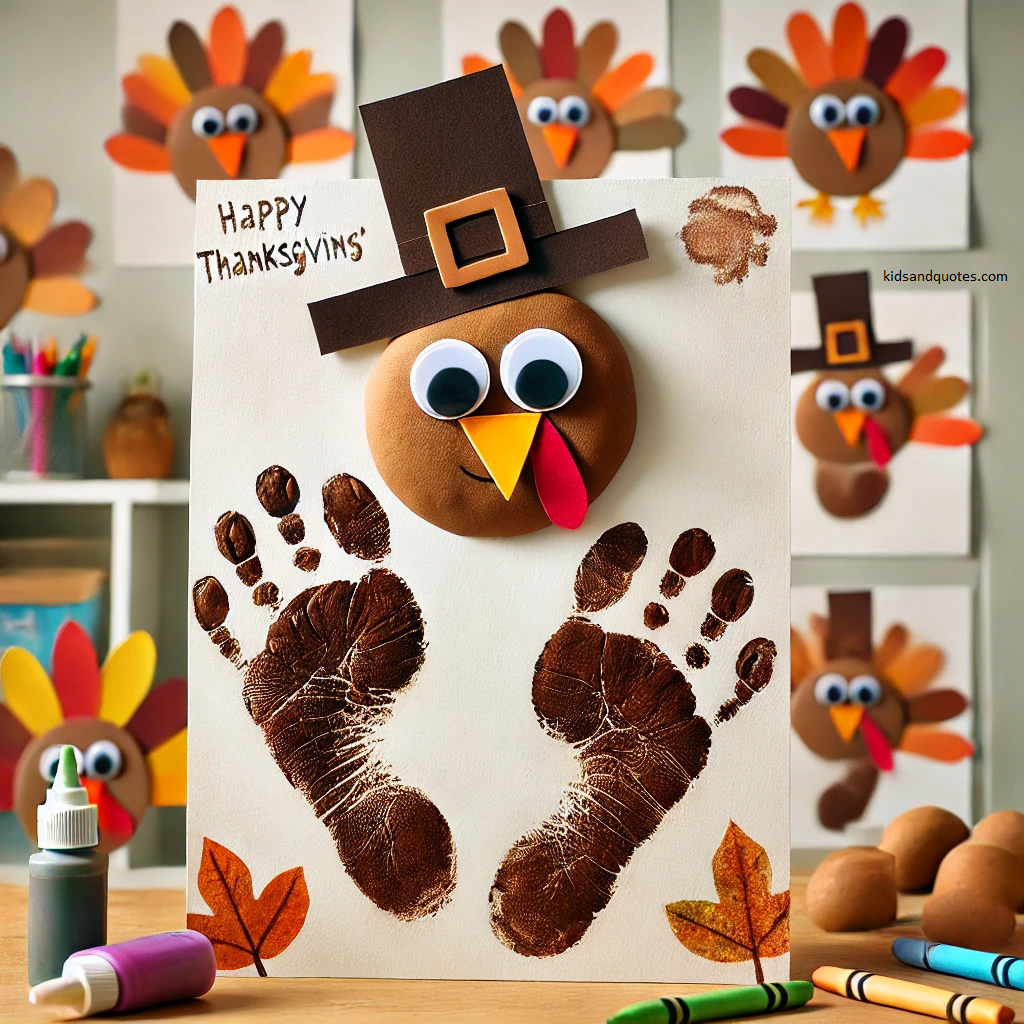
Ready to get a little messy with some Thanksgiving fun? Turkey Feet Stamps are a blast for kids, turning simple potato stamps into adorable turkey footprints! This craft lets them dip, stamp, and decorate, creating their own little turkey friends with just a few easy steps.
Materials
- Large potatoes (cut in half)
- Washable paint (brown, orange, red)
- Paper
- Googly eyes
- Markers or crayons
- Small brushes or cotton swabs for details
Steps
- Prepare the potatoes: Cut each potato in half to create a flat stamping surface. Each child will need one half to use as their “turkey feet” stamp.
- Dip and stamp: Pour the brown paint onto a tray or paper plate. Let the kids dip the flat side of their potato in the paint and press it onto their paper to create a footprint shape—these will be the turkey bodies!
- Add the details: Once the paint dries a bit, help them stick googly eyes near the top of each footprint. They can use a small brush or cotton swab to add a tiny beak and wattle with orange and red paint.
- Decorate the background: Give kids markers or crayons to add a background or extra touches, like feathers or a fall scene around their turkey stamps.
- Display and enjoy: Hang up the finished turkey stamps for a festive classroom display that everyone will love!
This activity is a fun way for kids to explore stamping while making cute Thanksgiving art they can proudly show off!
Thanksgiving Story Bracelets
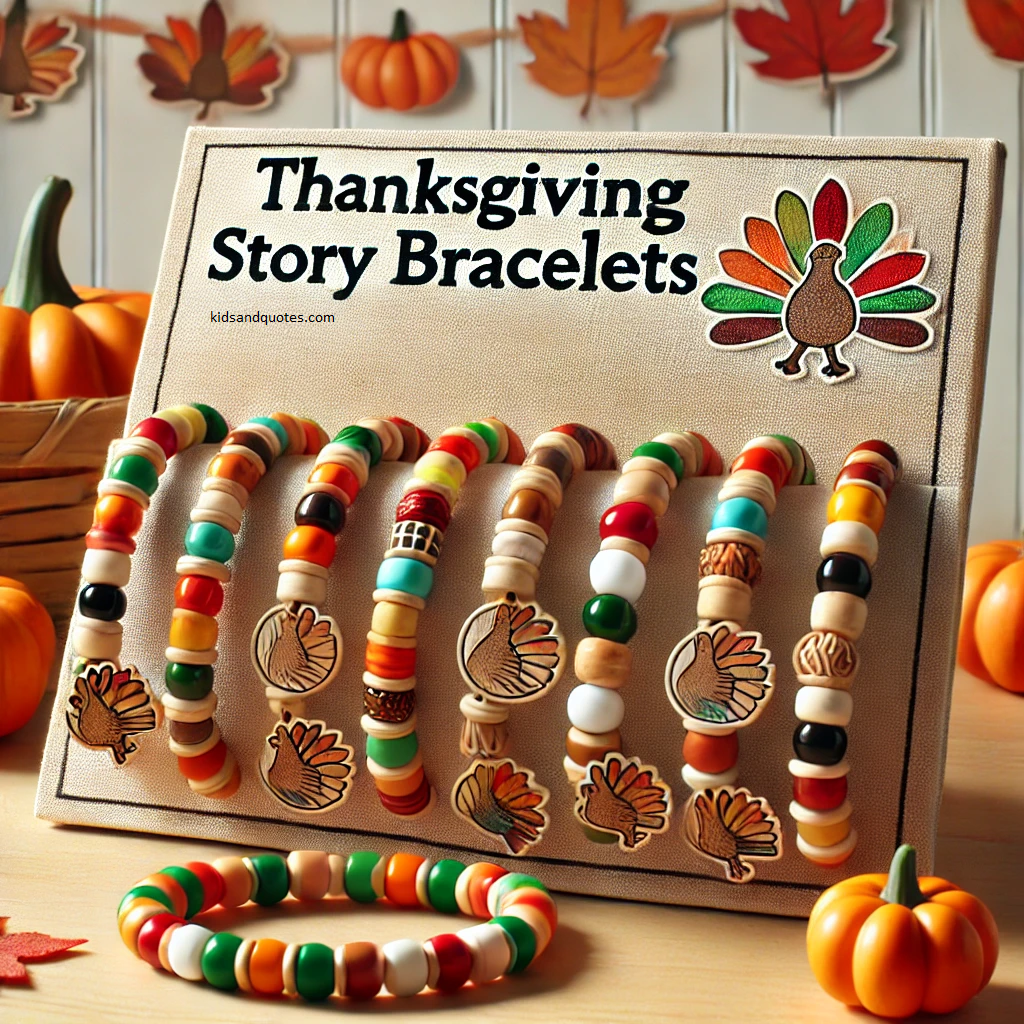
Ready to combine storytelling and crafting in one fun project? Thanksgiving Story Bracelets are a wonderful way to let kids learn about Thanksgiving while creating something they can wear and remember! With each bead representing a part of the Thanksgiving story, these bracelets become a colorful, hands-on memory of the holiday.
Materials
- Beads in fall colors (orange, red, yellow, brown, green)
- Elastic string or stretchy cord for bracelets
- Small bowls or trays to keep beads organized
- Thanksgiving story to share with bead meanings
Steps
- Prepare the beads: Give each child a set of beads in fall colors. Each color will represent a different part of the Thanksgiving story, making this a fun, meaningful project.
- Introduce the story: As the kids begin their bracelets, tell them a short, simple version of the Thanksgiving story. For each part of the story, let them know which bead color to add to their bracelet.
- Orange for the harvest pumpkins
- Red for the kindness and community among people
- Yellow for the corn and the first crops
- Brown for the earth and the Pilgrims’ journey
- Green for growth and the gratitude they shared
3. String the beads: As you tell each part of the story, have the kids string that color bead onto their cord, creating a pattern that matches the story they’re hearing.
4. Tie the bracelet: Once the story and beads are finished, tie the bracelet snugly so it fits each child’s wrist comfortably.
5. Wear and share: Now each child has a Thanksgiving Story Bracelet, a fun, wearable reminder of what they’ve learned and created together.
This activity is a wonderful blend of learning, memory, and creativity, giving each child a special keepsake to remember the meaning of Thanksgiving!
Harvest Basket Collage
Let’s celebrate Thanksgiving with a fun and colorful Harvest Basket Collage! This activity lets kids explore all the yummy fruits and vegetables we see at harvest time. By cutting and gluing pictures from magazines, they’ll create their own “Thanksgiving basket” filled with colorful goodies!
Materials
- Old magazines (with pictures of fruits, vegetables, and fall foods)
- Construction paper (for the basket background)
- Scissors
- Glue sticks
- Markers or crayons
Steps
- Find the harvest pictures: Have kids flip through magazines and cut out pictures of fruits, vegetables, and any foods they associate with fall and Thanksgiving. Encourage them to find as many colorful items as possible!
- Prepare the basket ground: Give each child a piece of construction paper and have them draw or color a simple basket shape on the bottom half of the paper. This will be the “basket” where all their harvest items will go.
- Arrange and glue: Help kids arrange their cutouts above the basket, letting items overlap and fill the basket to look bountiful. Once they’re happy with the arrangement, they can glue each piece in place.
- Add details: Use markers or crayons to add a handle to the basket or draw extra details like vines, leaves, or even some fall colors in the background.
- Display and share: Let kids proudly display their collages to show off their beautiful “Thanksgiving baskets” filled with harvest goodies!
This activity brings the spirit of Thanksgiving into the classroom, giving kids a hands-on way to celebrate the abundance of fall!
Paper Bag Thankful Books
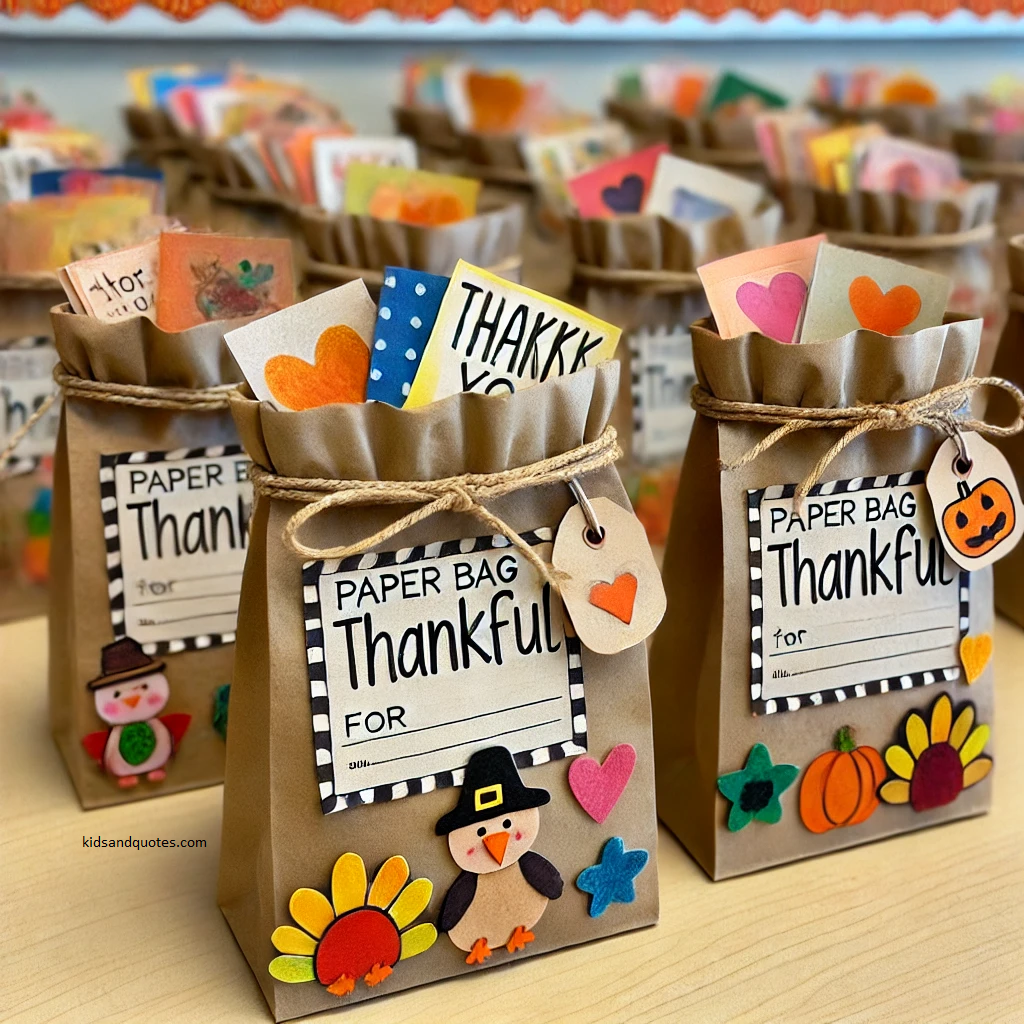
Let’s make gratitude come alive with Paper Bag Thankful Books! This activity lets kids decorate their own little “book” that they can fill with everything they’re thankful for. Each child will have a special place to write or draw what makes them happy, creating a keepsake full of gratitude!
Materials
- Small paper bags (lunch bag size works well)
- Markers, crayons, or colored pencils
- Stickers and stamps (for decorating)
- Small slips of paper (cut to fit in the bag)
- Tape or glue
Steps
- Decorate the paper bag: Give each child a paper bag and let them decorate the front with their name, drawings, or any fall-themed designs. They can use markers, stickers, and crayons to make it truly their own!
- Write thankful notes: Provide each child with several slips of paper. Encourage them to think of things they’re thankful for and either write or draw one idea on each slip.
- Fill the bag: Once they’ve written their thankful notes, have the kids place each one inside their decorated bag. These little slips become the “pages” of their Thankful Book.
- Seal the top (optional): For a special touch, fold down the top of the bag and seal it with a sticker, so it feels like a little book full of surprises inside.
- Share and display: If they’d like, children can share a few of their notes with the class, or you can display the bags on a shelf to create a “thankful corner” in the classroom.
If they’d like, children can share a few of their notes with the class, or you can display the bags on a shelf to create a “thankful corner” in the classroom.
Craft gratitude together with these easy Thanksgiving projects for kindergarten
Thanksgiving crafts are such a joyful way for little ones to connect with the holiday! Each of these easy Thanksgiving projects for kindergarten, from colorful turkey crafts to heartfelt gratitude activities, brings out their creativity and helps them understand the spirit of Thanksgiving.
By making these fun, hands-on creations, kids not only enjoy the season but also learn about thankfulness, kindness, and community. So, as they carry home their Thankful Books, Feather Garlands, and Turkey Feet Stamps, they’ll have their very own pieces of Thanksgiving to share and cherish!

