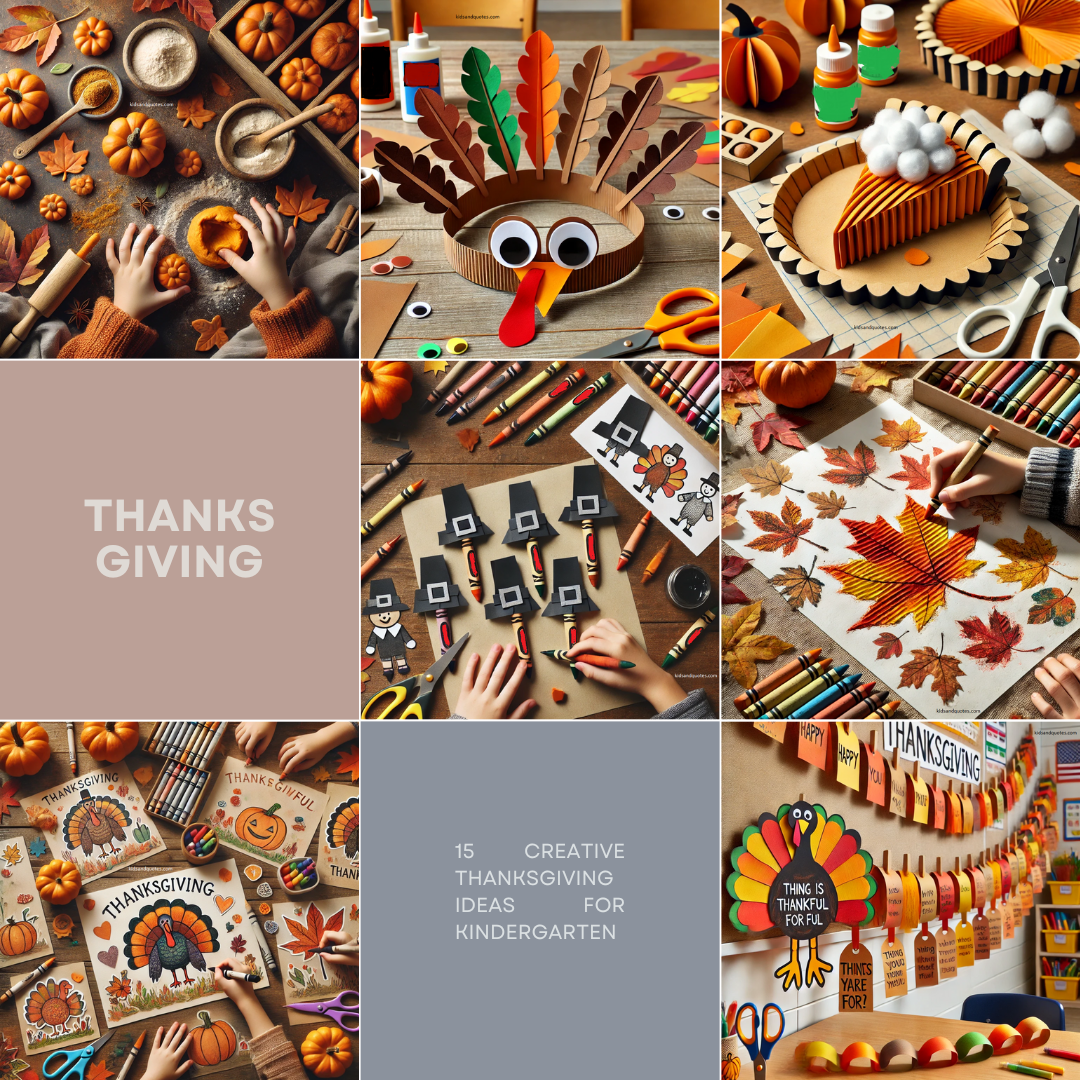
Thanksgiving in kindergarten? Oh, it’s truly the best! Just picture it—little hands busy with paint, giggles echoing around, and the classroom buzzing with holiday excitement.
I still remember my first year teaching when we made handprint turkeys—the kids were so excited to dip their little fingers in paint, and we had a rainbow of “turkey feathers” all over the classroom!
These 15 creative Thanksgiving projects for kindergarten are perfect for sparking joy and keeping kids learning. From handprint turkey crafts to gratitude trees, these ideas bring out the spirit of Thanksgiving with art, laughter, and a whole lot of gratitude.
Get ready for a season packed with fun projects, kindness, and heartwarming memories!
Here’re the thanksgiving projects for kindergarten
- Paper plate turkeys
- Thankful tree
- Handprint turkeys
- Pinecone turkey craft
- Turkey headbands
- Pumpkin pie paper craft
- Corn painting
- Leaf rubbings
- Thanksgiving placemat
- Gratitude bracelets
- Native American-inspired necklaces
- Pumpkin spice playdough
- Pilgrim hat crayons
- Thanksgiving story stones
- Turkey gratitude chain
Looking for the perfect crayons to bring these Thanksgiving activities and ideas to life? Last month alone, over 3,000 families and teachers chose Crayola Crayons Bulk (24 Packs) for their kids and classrooms, and they’ve quickly become a go-to favorite! With their vibrant colors, these crayons are perfect for making turkeys and all things Thanksgiving pop. Grab your pack now and let the creativity begin!
Paper Plate Turkey
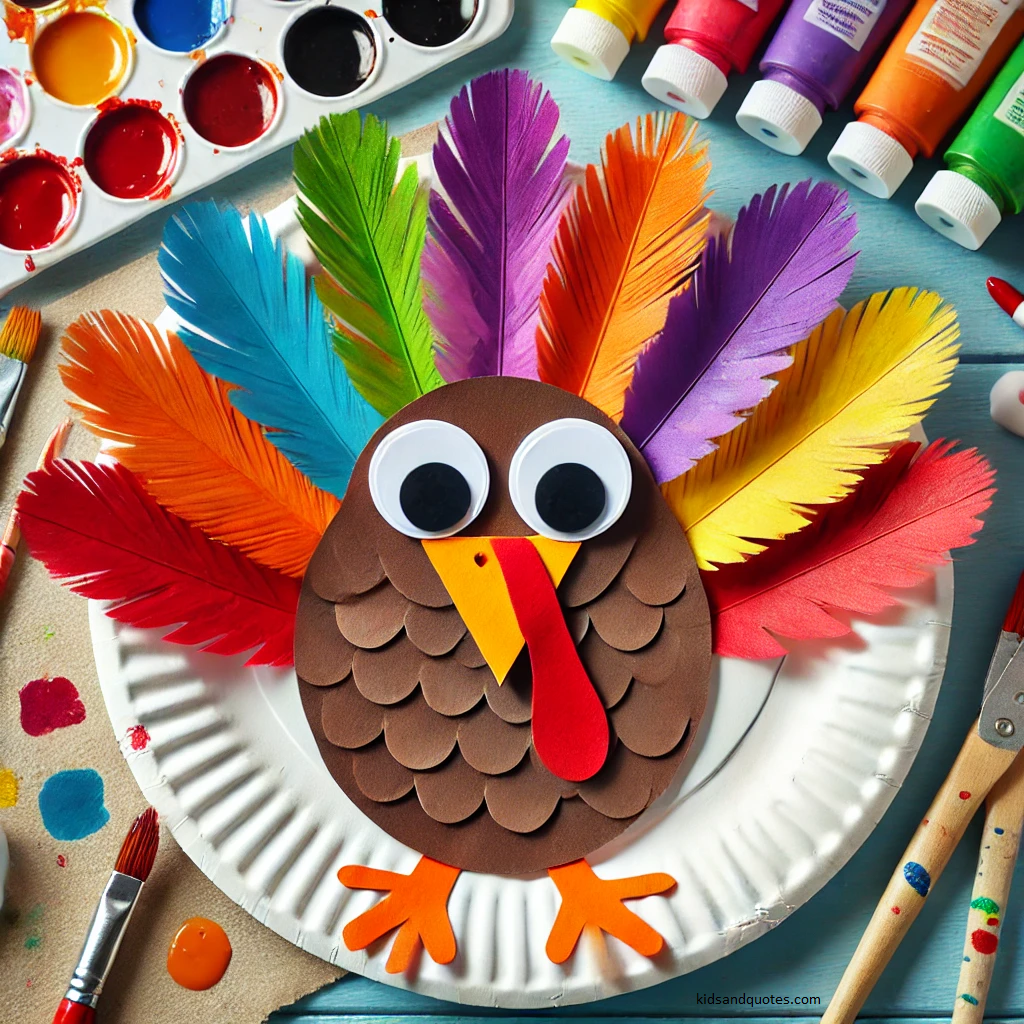
If there’s one Thanksgiving craft that never gets old, it’s the classic paper plate turkey! Kids love seeing a plain old paper plate turn into a colorful, feathery friend. It’s messy, it’s fun, and those little turkey faces always bring out the biggest smiles. Perfect for capturing the spirit of Thanksgiving!
Materials
- Paper Plates (one per child)
- Paint (variety of colors)
- Feathers (assorted colors)
- Googly eyes
- Construction paper (for beak and wattle)
- Glue
- Paint brushes
Steps
- Paint the paper plate: Have the kids paint their paper plates in any color they like. Brown is a classic choice, but bright colors make it extra fun!
- Add the eyes: Once the paint is dry, glue on two googly eyes near the top center of the plate.
- Create the beak and wattle: Cut a small triangle from the construction paper for the beak, and a little red wattle shape. Glue both below the googly eyes.
- Attach the feathers: Glue the colorful feathers around the top half of the plate to make a big, fluffy fan of feathers for the turkey.
- Let it dry: Give everything a few minutes to dry, and your turkey is ready to show off!
This simple project makes adorable decorations and gives each child a chance to get creative with their turkey’s colors and personality!
Thankful Tree
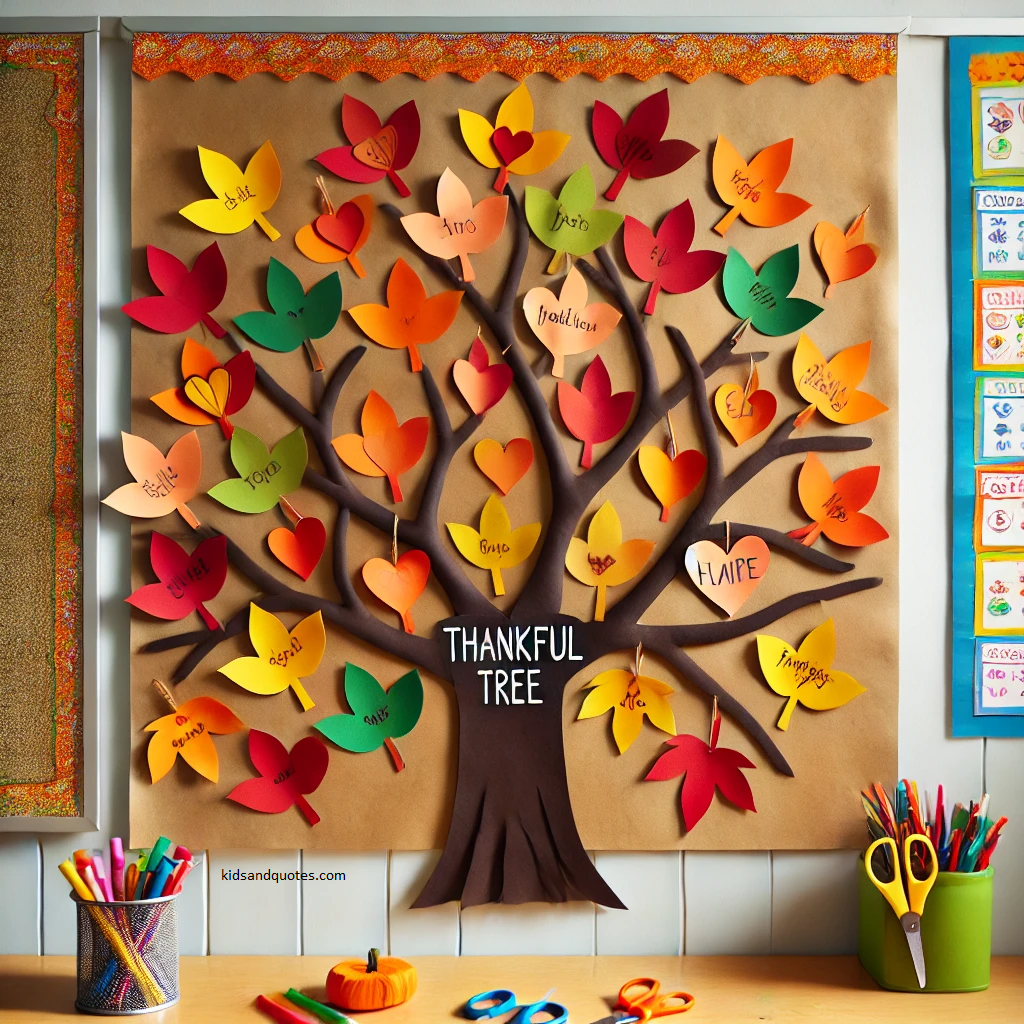
The Thankful Tree is one of those projects that really fills the room with warmth. Imagine each child adding their own little “thank you” leaf, watching the tree grow with everything they’re grateful for—it’s a beautiful sight! This project helps kids think about gratitude and makes a sweet, heartfelt decoration for Thanksgiving.
Materials
- Brown construction paper (for the tree trunk and branches)
- Colored construction paper (for leaves – orange, red, yellow, and green work well!)
- Scissors
- Markers or Crayons
- Tape or Glue
- Bulletin board or Wall space to display the tree
Steps
- Create the tree base: Cut out a large tree trunk and branches from the brown construction paper and tape it to a bulletin board or wall.
- Make the leaves: Have each child cut out a leaf shape from colored construction paper (or prepare the leaves ahead of time for younger kids).
- Write or draw their thanks: Ask each child to write or draw one thing they’re thankful for on their leaf. It could be family, friends, pets, favorite toys, or anything they love!
- Add the leaves to the tree: Let each child tape or glue their leaf onto the branches of the tree, creating a colorful display of gratitude.
- Watch the tree grow: As more leaves are added, the Thankful Tree becomes a reminder of all the wonderful things the class appreciates together.
This project not only gets little ones thinking about what they’re grateful for but also creates a sense of community and thankfulness in the classroom. Perfect for Thanksgiving!
Handprint Turkey
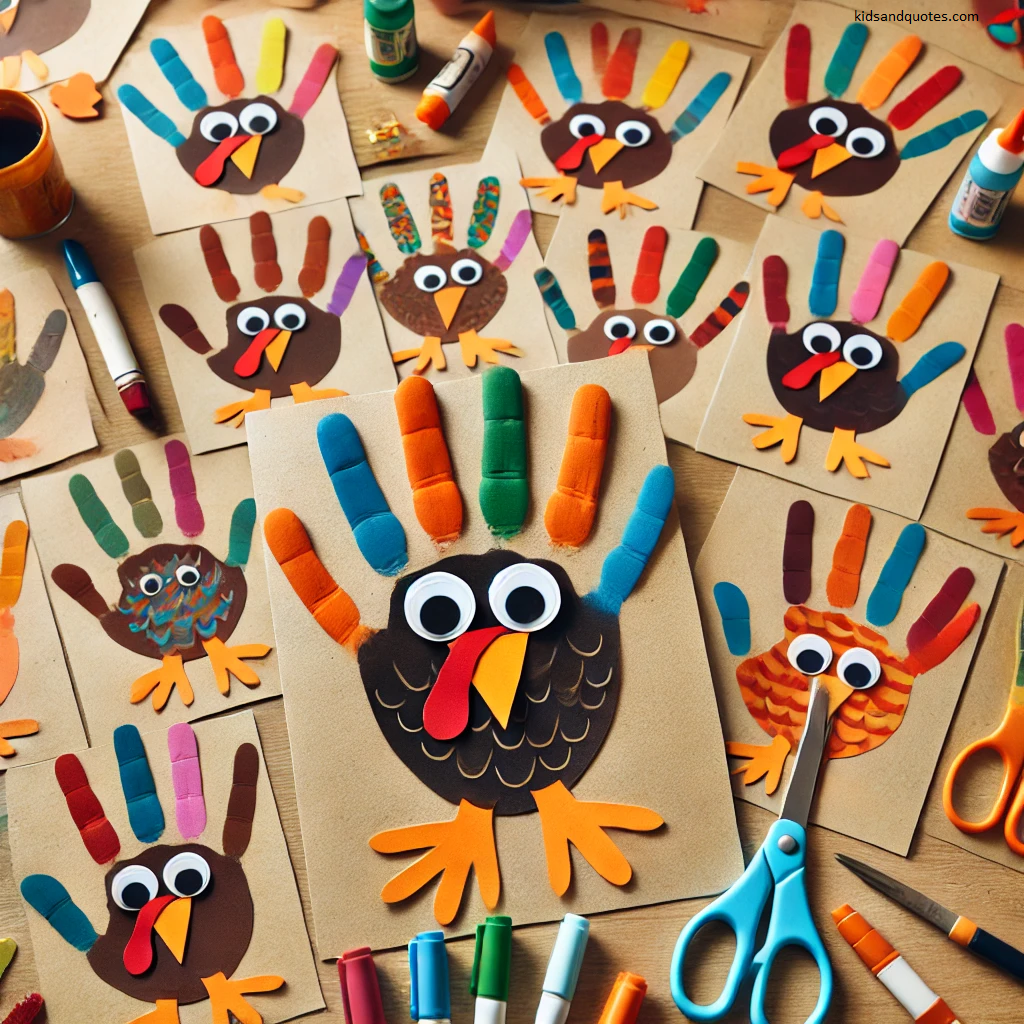
Handprint Turkeys are a Thanksgiving classic—and for good reason! There’s something so special about seeing those little handprints turn into colorful turkeys. Each one is unique, just like the kiddos making them! These handprint turkeys make adorable keepsakes for parents and are simple enough for even the littlest hands in the classroom.
Materials
- Colored construction paper
- Pencils (for tracing)
- Scissors
- Markers or Crayons
- Googly eyes
- Glue
- Orange and red construction paper (for beaks and wattles)
Steps
- Trace the hands: Have each child place their hand on a piece of colored construction paper, and carefully trace around it with a pencil. This handprint will be the shape of the turkey.
- Cut out the handprints: Once traced, help kids cut out their handprints or do it for them if they need a little help.
- Add the turkey face: Glue on a googly eye near the thumb (this will be the turkey’s head) and cut out a small triangle from the orange paper for the beak, plus a wattle shape from the red paper.
- Decorate the feathers: Use markers or crayons to color each finger as a feather, adding fun designs or patterns for extra personality.
- Display the turkeys: Once dry, hang the handprint turkeys around the classroom, or send them home as a sweet Thanksgiving keepsake.
These little turkeys are sure to bring smiles and remind everyone of the joy of Thanksgiving! Plus, they make wonderful little reminders of how much those hands will grow.
Pinecone Turkey Craft
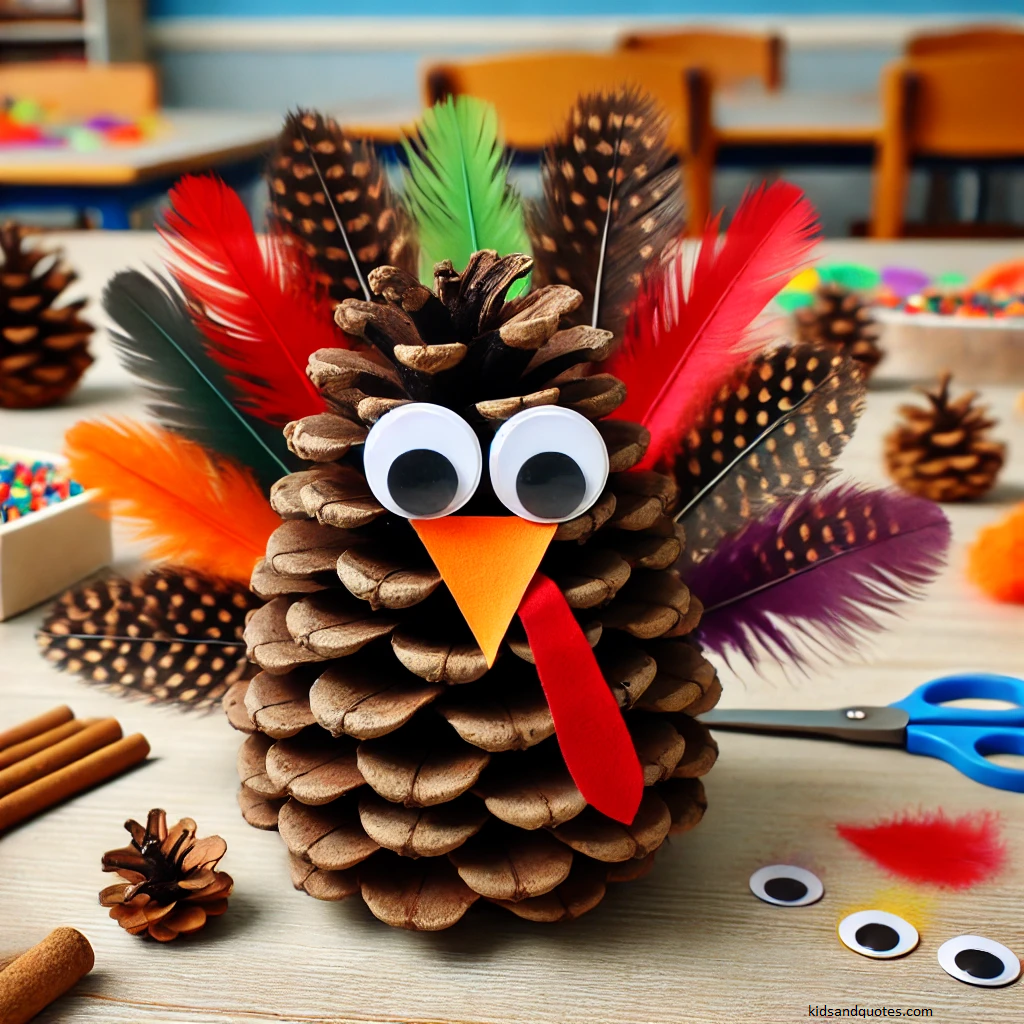
This Pinecone Turkey Craft brings nature right into the classroom! There’s something so fun about turning a simple pinecone into a quirky little turkey. Kids love working with feathers, and these little turkeys make perfect Thanksgiving table decorations or even gifts for family. It’s a hands-on way to connect with nature and the spirit of Thanksgiving.
Materials
- Pinecones (one per child)
- Feathers (various colors)
- Googly eyes
- Small pieces of orange and red construction paper (for beak and wattle)
- Craft glue
Steps
- Prepare the pinecone base: Each child picks a pinecone, which will form the turkey’s body.
- Add the feathers: Let kids choose a few colorful feathers and glue them to the back of the pinecone, sticking out like a fan of turkey feathers.
- Attach the eyes: Glue on two googly eyes near the top front of the pinecone for the turkey’s face.
- Make the beak and wattle: Cut a small triangle from orange paper for the beak and a little red wattle shape. Glue both below the googly eyes.
- Let it dry: Allow everything to dry completely before handling.
These little pinecone turkeys are as cute as they are easy to make, and each one has its own personality. Kids can even bring them home as fun, nature-inspired Thanksgiving decorations!
Turkey Headband
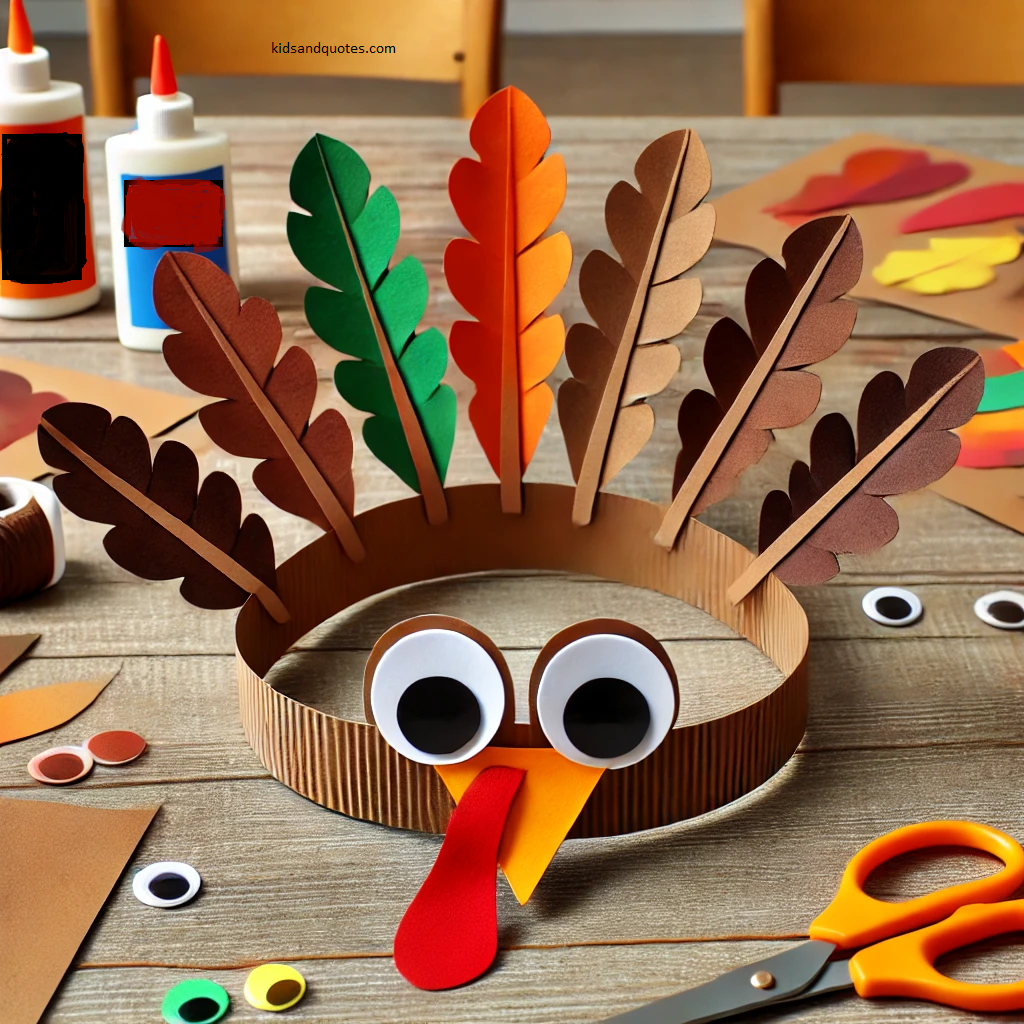
Turkey Headbands are a Thanksgiving favorite—just wait till you see a room full of little turkeys strutting around! These headbands are fun, easy to make, and perfect for a festive classroom parade. Kids get to pick their favorite feather colors, and before you know it, they’re transformed into a whole flock of turkeys!
Materials
- Construction paper (brown, orange, red, yellow, and other feather colors)
- Scissors
- Glue or tape
- Googly eyes
- Stapler or tape (for securing the headbands)
Steps
- Create the headband base: Cut long strips of brown construction paper and fit one around each child’s head, securing the ends with a stapler or tape.
- Make the feathers: Have kids cut feather shapes out of different colored construction paper. Let them pick their favorite colors to make each headband unique!
- Attach the feathers: Glue or tape the feathers to the back of the headband so they stick up behind the child’s head like a turkey’s tail.
- Add the eyes and beak: Glue on two googly eyes near the front center of the headband. Cut a small orange triangle for the beak and a red wattle shape, then attach both below the eyes.
- Show off their turkeys: Once dry, the kids can wear their headbands and parade around like a flock of festive little turkeys!
These turkey headbands make for an adorable photo op, and they add a bit of holiday magic to the classroom!
Pumpkin Pie Paper Craft
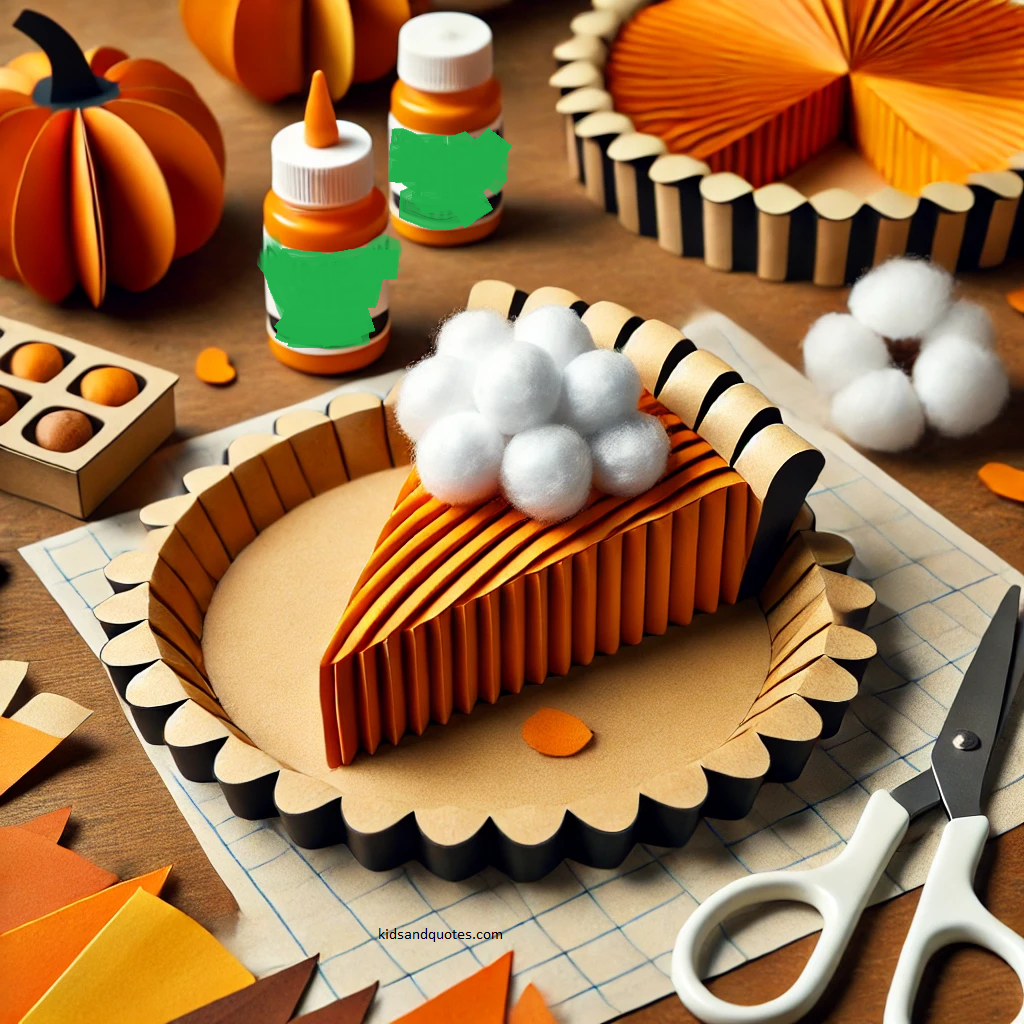
Pumpkin pie without the sticky mess? Yes, please! This Pumpkin Pie Paper Craft is as cute as it gets and lets kids “serve up” a slice of Thanksgiving tradition. With just a few colorful papers and a fluffy cotton “whipped cream,” this craft is perfect for adding a little holiday flavor to the classroom.
Materials
- Orange construction paper (for the pie filling)
- Brown construction paper (for the crust)
- Scissors
- Glue
- Cotton balls (for whipped cream)
Steps
- Cut the pie shape: Have each child cut a triangle from the orange construction paper to look like a slice of pie.
- Add the crust: Cut a slightly larger triangle from the brown paper and glue it behind the orange piece to create a “crust” edge around the pie.
- Attached the whipped cream: Glue a cotton ball at the top of the slice to look like a dollop of whipped cream.
- Decorate if desired: Kids can add crayon or marker details on the “pie filling” for extra fun (like lines or dots to make it look more realistic).
This pumpkin pie craft is a simple way to bring a taste of Thanksgiving to your room—no baking required! Kids love showing off their “slices” and adding them to a festive display.
Corn Painting
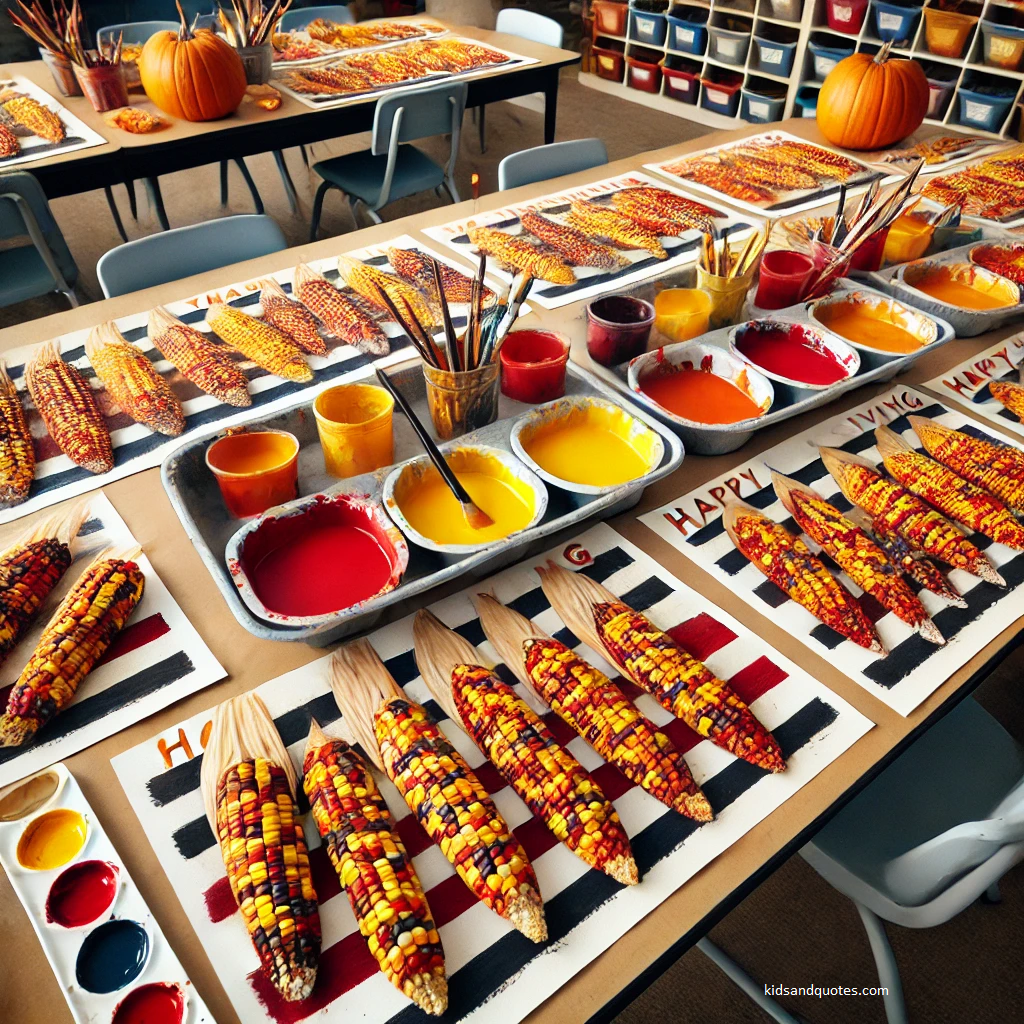
Corn Painting is a total hit in the classroom! Kids love getting their hands on real corn cobs and rolling them in paint—it’s messy, colorful, and full of fun textures. Plus, it’s a great sensory activity that lets kids explore patterns in a playful, hands-on way. Perfect for adding a splash of fall to your Thanksgiving projects!
Materials
- Fresh or dried corn cobs
- Washable paint (fall colors like red, orange, yellow, and brown work well)
- Large sheets of white or construction paper
- Shallow trays or plates for paint
- Aprons or smocks (optional, but recommended)
Steps
- Set up the paint trays: Pour different colors of washable paint into shallow trays, so it’s easy to roll the corn cobs.
- Dip the corn cobs: Have each child roll their corn cob in the paint, making sure it’s fully covered for the best patterns.
- Roll on paper: Next, let the kids roll their painted corn cobs across the paper to create unique patterns. They can try different directions or mix colors for a layered effect!
- Dry and display: Once they’re done, set the artwork aside to dry. The final effect is like a colorful, textured field of corn!
This activity gets kids engaged and exploring, and each print turns out so unique. It’s a perfect way to celebrate the fall harvest and bring art, nature, and fun together!
Leaf Rubbings
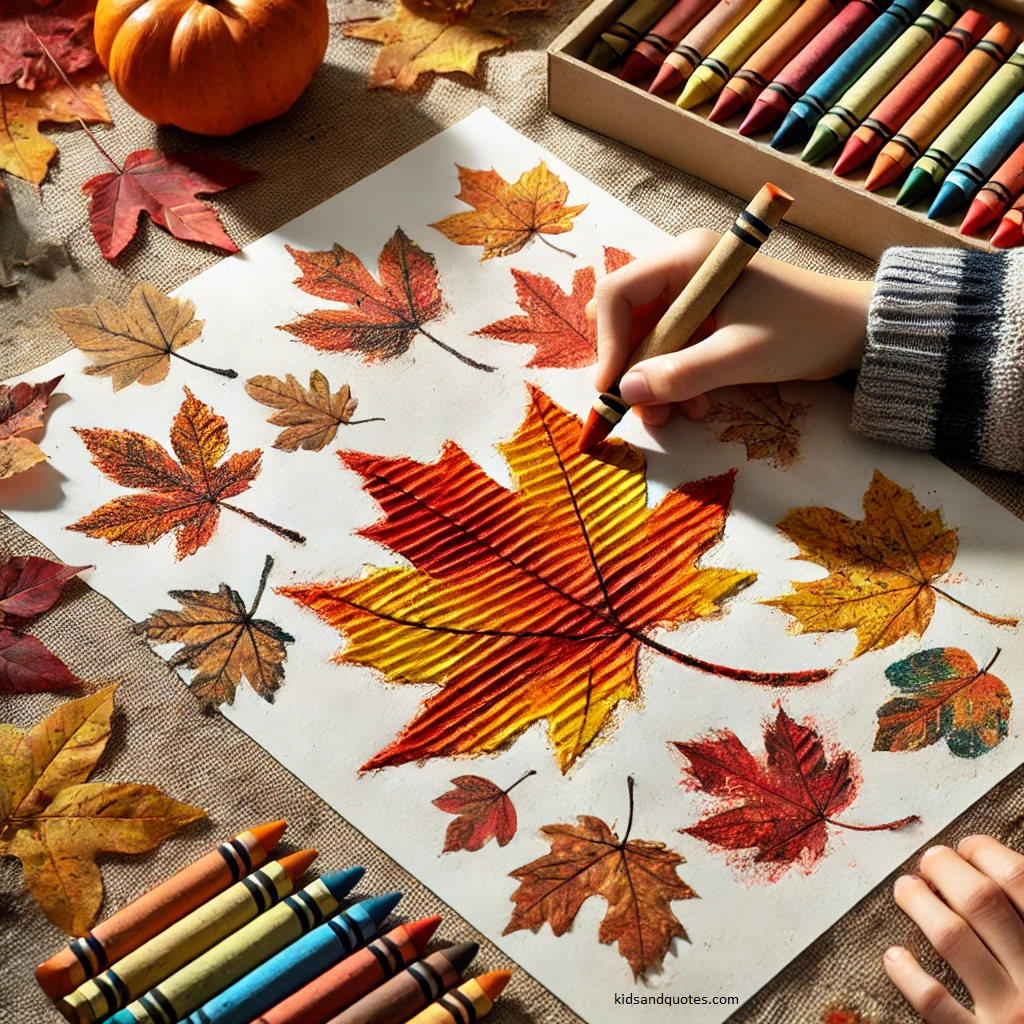
Leaf Rubbings are a beautiful way to capture the magic of fall! Kids love collecting their favorite leaves and then seeing all those intricate details pop out on paper. It’s simple, colorful, and full of that autumn charm! Plus, it’s a great way to connect with nature and explore the changing season right in the classroom.
Materials
- Fallen leaves (try to find leaves with interesting veins and textures)
- Crayons (in fall colors like red, orange, yellow, brown, and green)
- White or light-colored paper
- Optional: Clipboards or boards to keep the paper steady
Steps
- Collect the leaves: Go on a little “leaf hunt” with the kids or have them bring in leaves they’ve found. Look for leaves with lots of texture.
- Set up the paper and leaf: Place a leaf under a sheet of white paper, vein-side up for the best details.
- Rub with crayons: Let the kids gently rub a crayon over the paper on top of the leaf. Encourage them to try different colors and watch the leaf’s shape and details magically appear!
- Create a collage: They can try rubbing multiple leaves on the same paper to make a colorful fall collage.
This simple project makes beautiful artwork and gives kids a hands-on way to explore the shapes and textures of autumn leaves. Perfect for decorating the classroom!
Thanksgiving Placemat
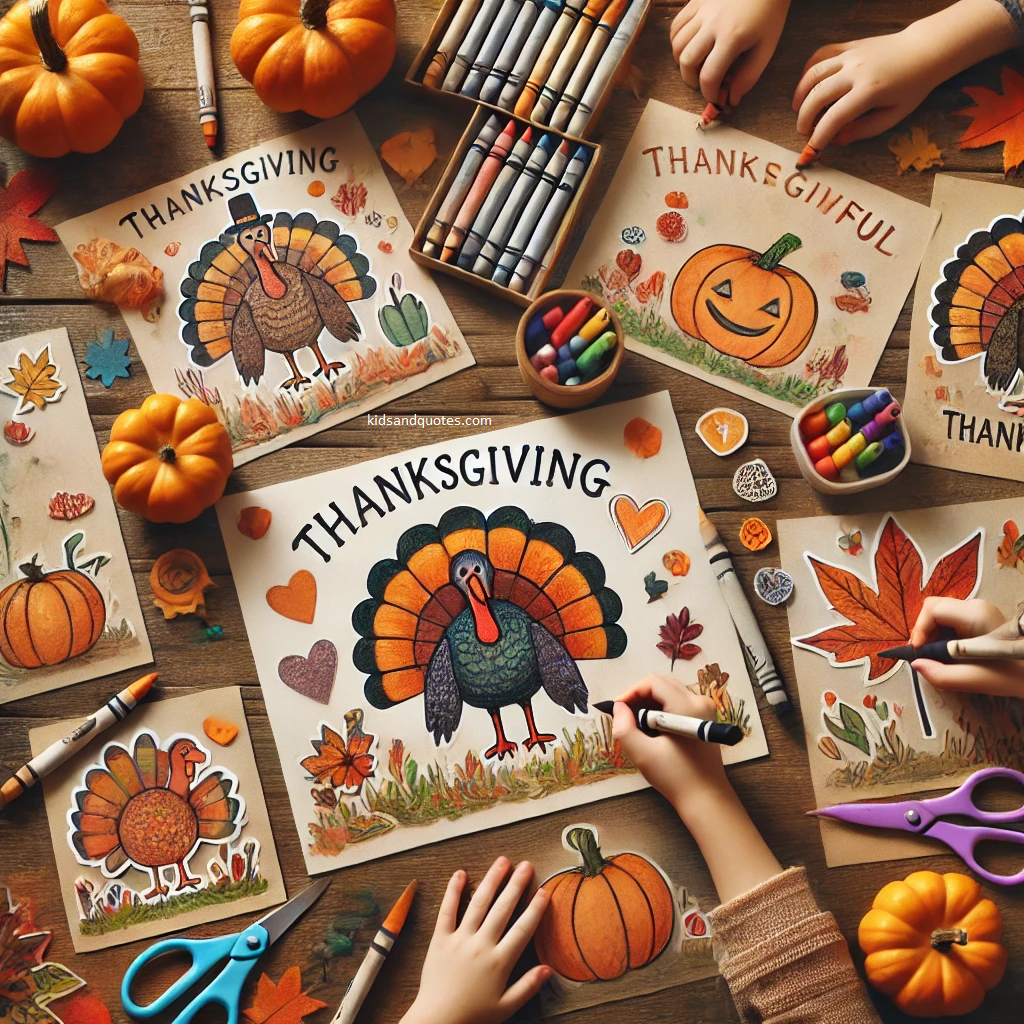
Hey there! Here’s a great idea for adding some kid-made charm to your Thanksgiving table. Kids can create their very own Thanksgiving placemats with drawings and colors that capture the spirit of the holiday. Imagine those tiny hands decorating their own placemat to use during the big meal – it’s such a special way to involve them!
Materials needed
- Blank sheets of heavy paper (11” x 17” works well)
- Crayons, markers, and colored pencils
- Thanksgiving-themed stencils (optional: turkeys, pumpkins, leaves)
- Stickers (fall leaves, acorns, turkeys, etc.)
- Laminating sheets or clear contact paper (optional but great for durability)
- Scissors (if customizing shapes)
Steps
- Set up your workspace: Gather all the materials and set up a clean, flat area for decorating. Lay out the markers, crayons, stencils, and stickers.
- Draw and decorate: Have kids start decorating their blank paper with Thanksgiving themes. They can draw turkeys, pumpkins, leaves, and write what they’re thankful for. Encourage creativity!
- Add stickers and colors: Kids can add stickers and use stencils for fun details. They can make each placemat unique, adding personal touches with colors and shapes.
- Laminate (optional): Once decorated, laminate each placemat for durability. Laminated placemats can be reused or even kept as keepsakes for future Thanksgivings!
- Set the table with their artwork: Use the placemats during Thanksgiving dinner, adding a personal, homemade touch to the table. The kids will be so proud to see their creations in action!
This activity is such a heartwarming way for kids to contribute and share their creativity at the Thanksgiving table!
Gratitude Bracelets
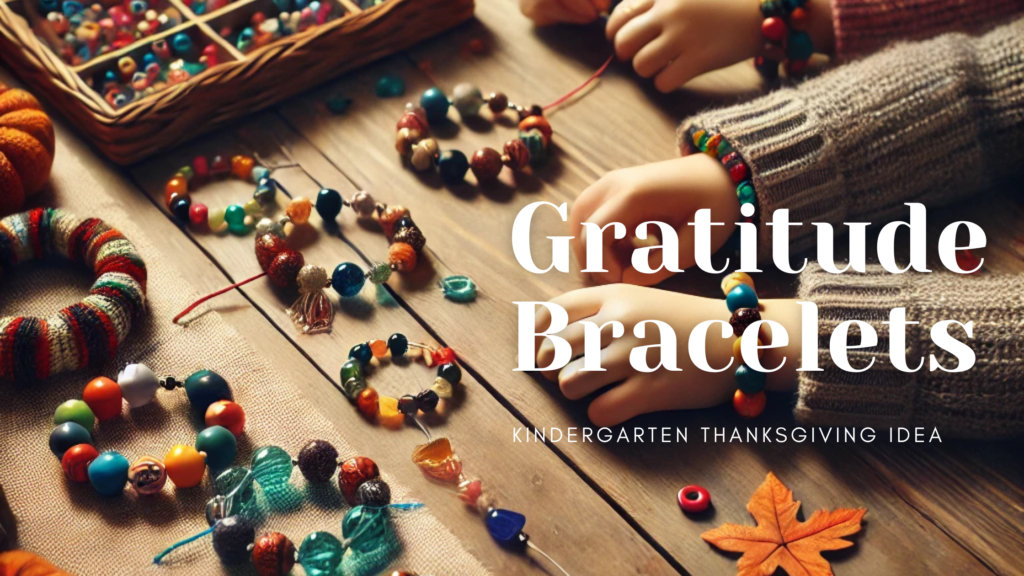
Hey there, let’s make gratitude fun and personal! With Gratitude Bracelets, kids can string beads onto a bracelet, with each bead representing something or someone they’re thankful for. It’s a beautiful way to talk about gratitude while letting them create a keepsake they can wear proudly!
Materials
- Colorful beads (different shapes and sizes make it fun!)
- Pipe cleaners or yarn (long enough to fit a bracelet)
- Scissors (for yarn, if needed)
- Small markers or stickers (optional, to add tiny symbols or initials on some beads)
Steps
- Talk about gratitude: Start by discussing what gratitude means and some things they feel grateful for—family, friends, favorite activities, nature, anything that makes them smile!
- Choose the beads: Let kids pick beads they love. They can select colors or shapes that remind them of what they’re thankful for. Maybe blue for the sky, green for the trees, or a heart bead for family!
- String the beads: Have them string each bead onto the pipe cleaner or yarn. For every bead they add, they can say aloud what it represents. It’s a wonderful way to reflect on all the good things in their lives!
- Tie and wear: Once all the beads are strung, twist or tie the ends securely to make a bracelet. Now, they have a colorful, wearable reminder of all they’re grateful for.
This craft is easy, meaningful, and makes a great reminder of thankfulness that kids can see and wear every day!
Native American-inspired Necklaces
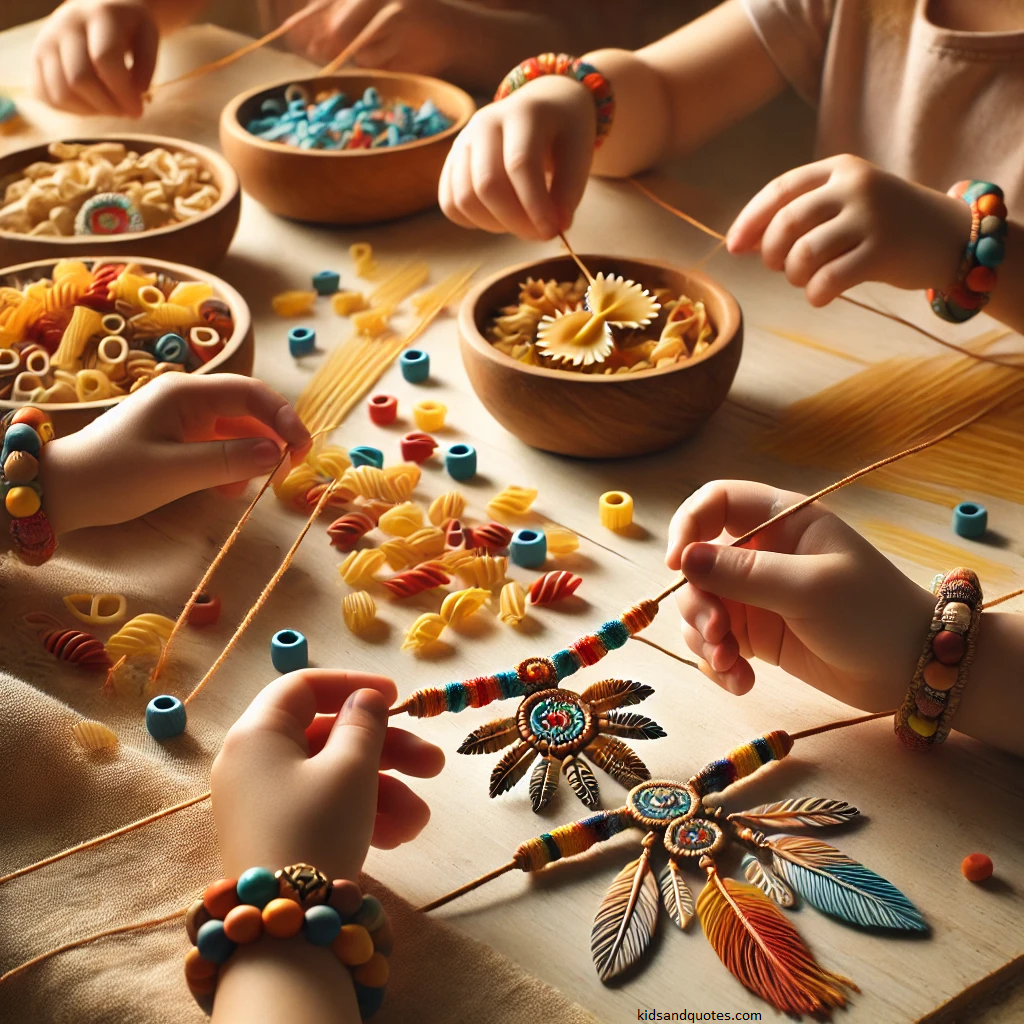
Let’s dive into a fun craft inspired by the beautiful designs of Native American jewelry! Kids can create colorful necklaces with pasta and beads, learning about patterns, colors, and culture along the way. Plus, it’s a great way to practice those fine motor skills!
Materials
- Dried pasta in various shapes (like penne or macaroni)
- Beads of different colors and sizes
- Food coloring or paint (to color the pasta, optional)
- Yarn or string (long enough for a necklace)
- Scissors (for cutting yarn)
- Small plastic bowls (for mixing pasta and colors, optional)
Steps
- Color the pasta (optional): If you’d like colorful pasta, mix a few drops of food coloring with dry pasta in a plastic bowl, shake, and let it dry. You can make red, blue, green, or any color you want!
- Set up your beads and pasta: Arrange the different beads and pasta shapes in small bowls. Kids can choose a mix of colors and shapes to create unique patterns.
- Thread the necklace: Start threading the pasta and beads onto the yarn or string. Encourage kids to make patterns, like alternating colors or shapes, inspired by Native American designs.
- Tie the necklace: Once they’ve reached the desired length, tie the ends securely. Now, each child has a beautiful, handmade necklace inspired by Native American artistry!
This activity lets kids explore creativity and culture while creating something special they can wear or gift!
Pumpkin Spice Playdough
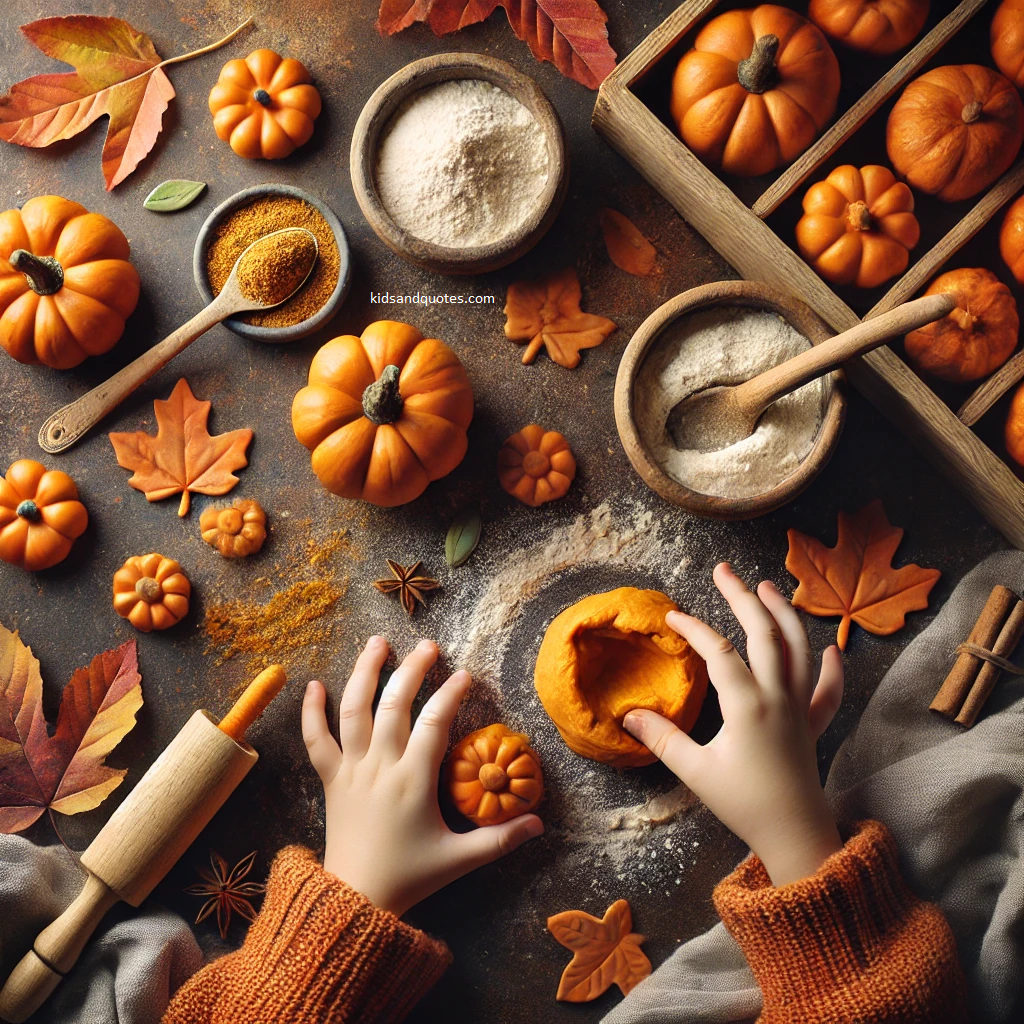
Ready for a fun, sensory craft that smells like fall? With Pumpkin Spice Playdough, kids can mold little pumpkins, leaves, or anything they imagine – and the best part? It smells like pumpkin spice! This is a wonderful way to bring fall scents and creativity together in one hands-on activity.
Materials
- 1 cup of flour
- 1/2 cup of salt
- 1 tablespoon of cream of tartar
- 1 tablespoon of pumpkin pie spice (or a mix of cinnamon, nutmeg, and cloves)
- 1 tablespoon of vegetable oil
- 1 cup of water
- Orange food coloring (optional, for a pumpkin color)
- Small mixing bowl and spoon
- Small containers (for storing playdough)
Steps
- Mix dry ingredients: In a small bowl, combine the flour, salt, cream of tartar, and pumpkin pie spice. Stir well to spread that delicious fall scent throughout!
- Add wet ingredients: Add the vegetable oil, water, and a few drops of orange food coloring (if you want it to look like a pumpkin). Stir until it becomes doughy.
- Cook the mixture: Pour the mixture into a pan on low heat and keep stirring. It will thicken and form a dough. Once it pulls away from the pan and isn’t sticky, it’s ready!
- Knead and shape: Let the dough cool a bit, then knead it until it’s smooth. Now, kids can start shaping mini pumpkins, leaves, or anything they like!
- Store for later: Place the playdough in an airtight container when done, and it’ll stay fresh and ready for play.
This pumpkin spice playdough adds a delightful fall scent to crafting, making it extra fun and festive for the season!
Pilgrim Hat Crayons
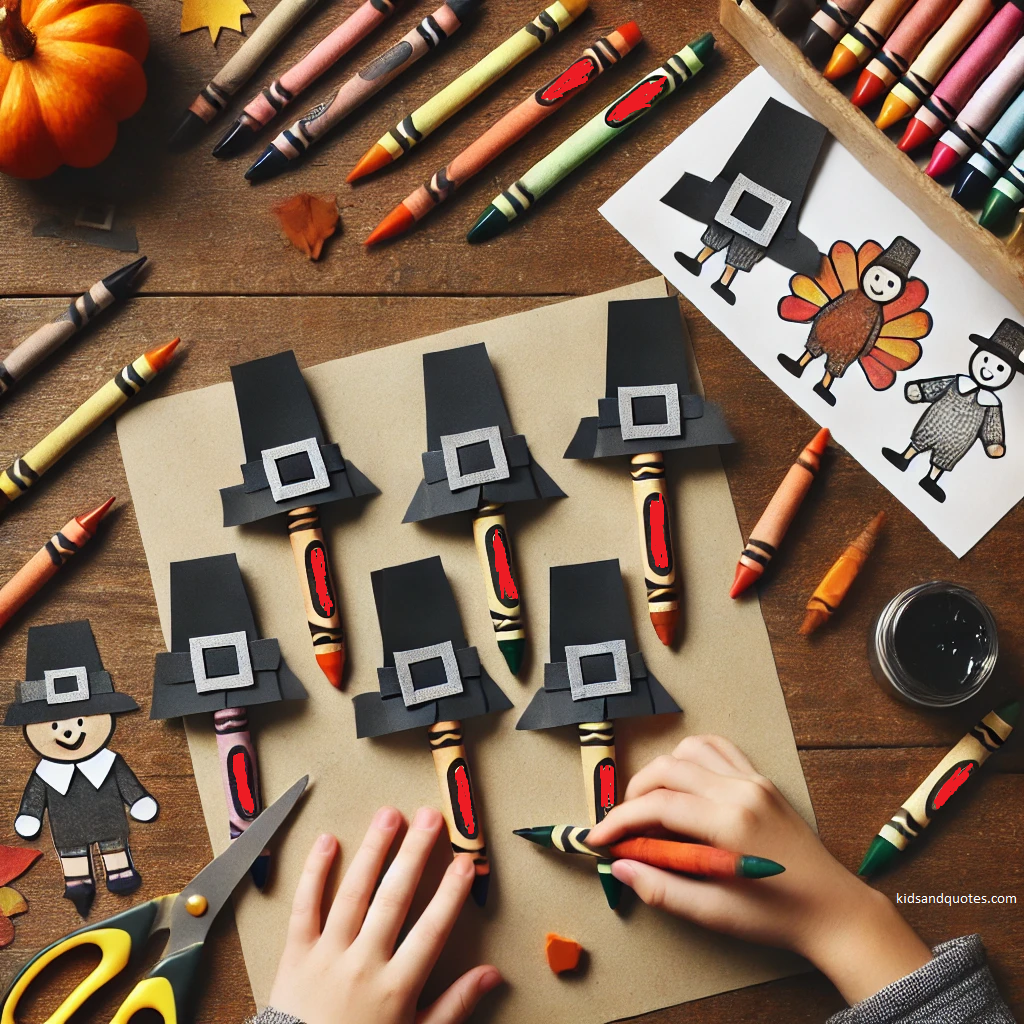
Let’s make coloring for Thanksgiving a little more festive! With Pilgrim Hat Crayons, kids can take old crayons and turn them into mini Pilgrim hats with black construction paper. These little hats are perfect for adding a Thanksgiving twist to their art!
Materials
- Old crayons (any color)
- Black construction paper
- Scissors
- Tape or glue stick
- Thanksgiving-themed coloring pages (optional, for extra fun!)
Steps
- Wrap the crayons: Cut a small rectangle of black construction paper for each crayon. Wrap the paper around the crayon, creating the main part of the “hat,” and secure it with tape or glue.
- Create the hat brim: Cut a small circle from the black construction paper, slightly wider than the crayon. Attach it to the bottom of the wrapped crayon with tape or glue. Now, it looks like a Pilgrim hat!
- Add details (optional): If you’d like, add a tiny strip of paper around the hat for a hatband or a square “buckle” to make it even more authentic!
- Get coloring: Now, kids can use their Pilgrim hat crayons to color Thanksgiving-themed pictures. It’s a fun way to celebrate the holiday and add a creative twist to their coloring time!
This simple craft gives new life to old crayons, making them a unique part of the Thanksgiving celebration!
Thanksgiving Story Stones
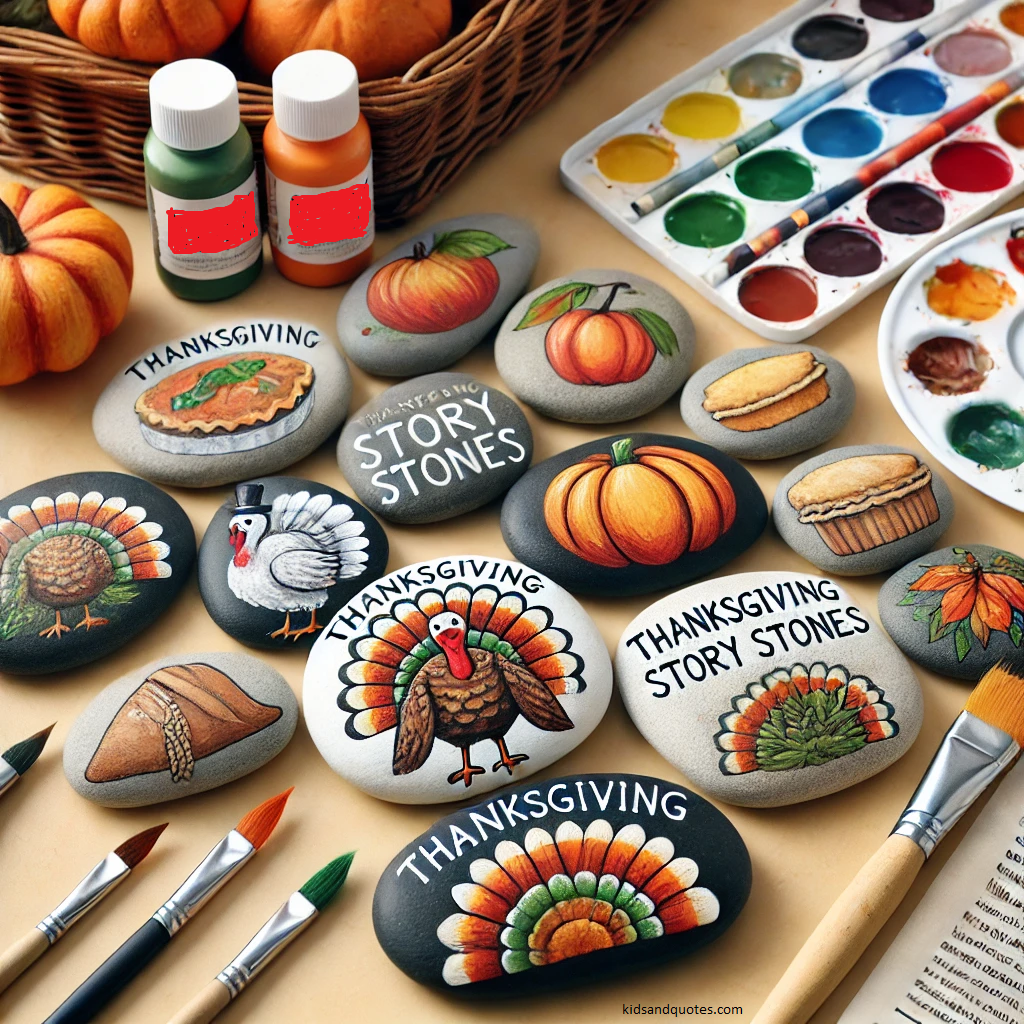
Thanksgiving Story Stones are a storytelling adventure in the making! Kids get to paint their own little “story stones” with all kinds of Thanksgiving images—from turkeys to pies to autumn leaves. Once they’re done, these stones become tools for telling creative, Thanksgiving-inspired tales. It’s a fun, hands-on way to encourage imagination and storytelling!
Materials
- Smooth, flat stones (big enough to paint on)
- Acrylic paints or paint pens
- Paintbrushes
- Clear sealant (optional, to keep the paint from chipping)
- Paper towels or trays for drying
Steps
- Prepare the stones: Clean the stones and make sure they’re dry. Lay out a few paper towels or trays to place them on while they dry.
- Paint the thanksgiving images: Let each child paint a different Thanksgiving-themed image on their stone. Some ideas include a turkey, pumpkin pie, fall leaves, a cornucopia, or a pilgrim hat. Use paint pens or brushes for details!
- Let dry and seal: Allow the stones to dry completely. Optionally, you can apply a clear sealant to make the images last longer.
- Tell stories: Once dry, gather everyone together and invite the kids to use their stones to create and tell their own Thanksgiving stories. They can even take turns, adding one stone at a time to make it a group story!
These story stones make for a unique, hands-on way to explore storytelling while celebrating Thanksgiving traditions. It’s amazing to see the creativity that unfolds!
Turkey Gratitude Chain
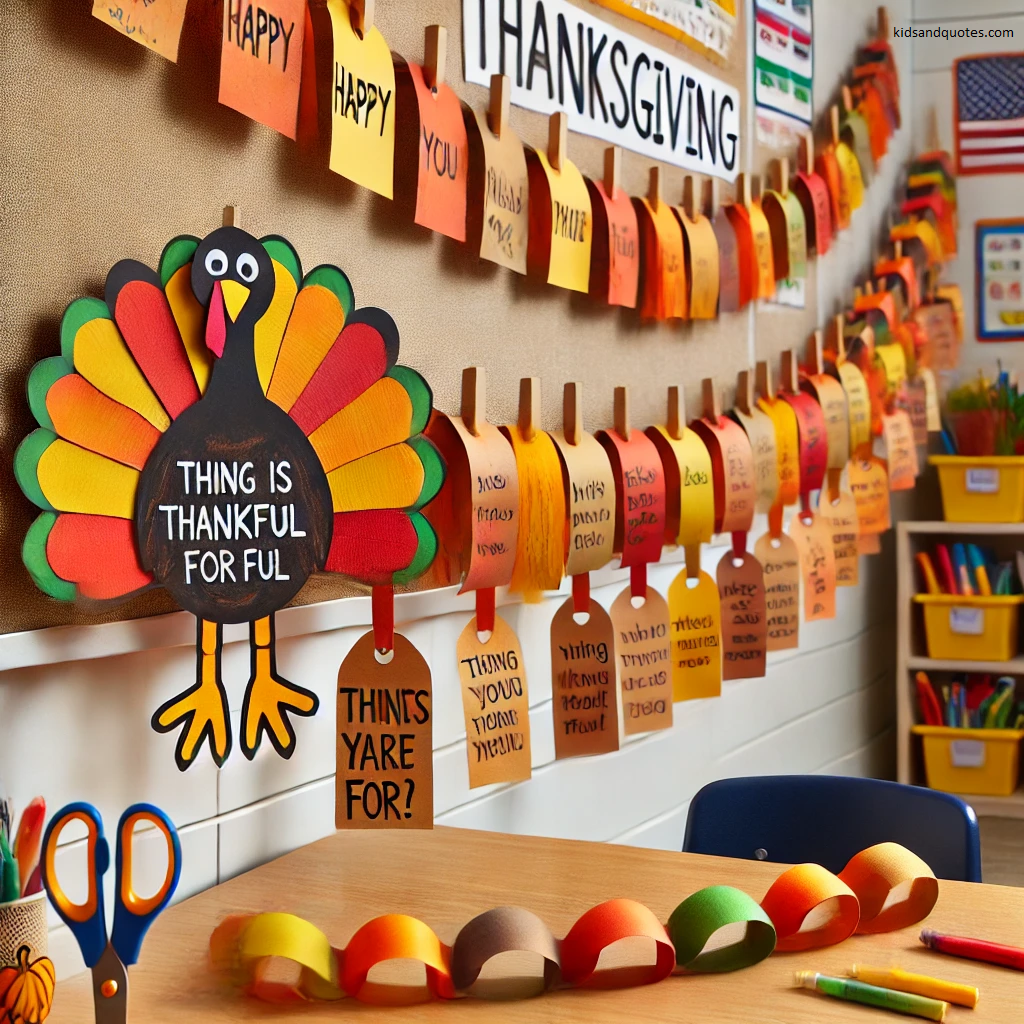
The Turkey Gratitude Chain is a wonderful way to fill the classroom with thankfulness! Kids write down what they’re grateful for on colorful paper strips, then link them together to create a beautiful, growing chain of gratitude. It’s a heartwarming way to show how everyone’s “thank yous” come together—and it makes a fantastic Thanksgiving decoration!
Materials
- Colored paper (fall colors like orange, yellow, red, and brown)
- Scissors
- Markers or crayons
- Glue or tape
Steps
- Cut the paper strips: Pre-cut or have the kids cut strips of colored paper, each about an inch wide.
- Write thankful messages: Ask each child to write one thing they’re thankful for on a paper strip. Encourage them to think about family, friends, pets, or favorite activities.
- Link the strips together: Form the first strip into a loop and glue or tape the ends. Then, loop each new strip through the last link to create a long chain.
- Shape and display the chain: Once everyone has added their thankful strips, you can shape the chain into a turkey outline on the wall or simply hang it around the classroom as a festive, gratitude-filled decoration.
This colorful chain reminds everyone to be thankful and brings a warm, cozy touch to the classroom. It’s a Thanksgiving project that grows with each little “thank you”!
Bring thanksgiving to life in the classroom
Thanksgiving in kindergarten is all about hands-on fun and sharing what we’re grateful for! These 15 projects—whether it’s handprint turkeys, leaf rubbings, or a turkey gratitude chain—make the season come alive with color, creativity, and a whole lot of heart.
Get ready to see little faces light up and hear giggles fill the room as your classroom transforms with these Thanksgiving crafts. Here’s to building gratitude and making festive memories that last!
