Halloween is one of those times that just gets kids buzzing with excitement! From spooky costumes to glowing pumpkins, it’s all about fun and creativity. And let’s be honest, kids love anything they can make with their own hands. That’s why these 21 Halloween craft ideas are perfect for all age groups.
I still remember last year when we made spooky bat hats… one of my students wore hers the entire week, even to bed! Whether you’ve got toddlers or tweens, these simple, affordable crafts will have them crafting up a storm. Plus, they’re a hit at Halloween parties or for a cozy, crafty afternoon at home.
Here below are some age-specific Halloween craft ideas
Halloween craft ideas for toddlers
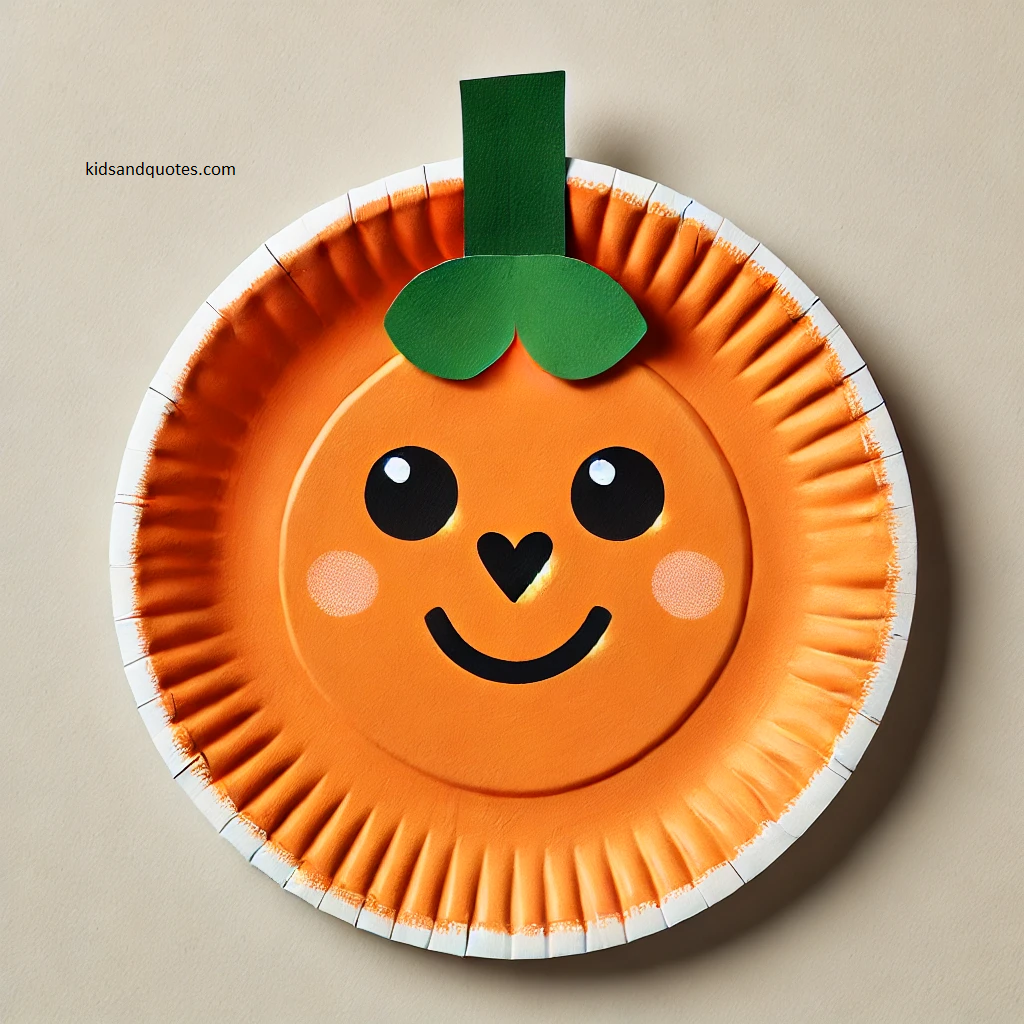
Paper plate Pumpkins
Materials needed
- 1 Paper Plate (preferably round and white)
- Orange Paint (washable, child-safe)
- Green Construction Paper (for the stem)
- Black Marker (or crayon for the face)
- Glue Stick (to attach the stem)
- Paintbrush (or sponge brush)
- Safety Scissors (optional, for cutting the stem)
Instructions
Paint the pumpkin:
- Have your toddler paint the entire paper plate orange. Let them use a paintbrush or sponge to spread the paint around. It’s okay if it’s not perfect—let them have fun with it!
- Set aside the plate to dry for a few minutes.
Make the stem:
- While the paint dries, cut out a small rectangle or a “stem” shape from the green construction paper.
- Help your toddler apply glue to the back of the green paper and stick it to the top of the paper plate as the pumpkin’s stem.
Draw the face:
- Once the orange paint is dry, use a black marker or crayon to draw a simple, smiling face on the pumpkin. Let your toddler add the eyes, nose, and mouth however they like!
Show it off:
- Once everything is dry, the paper plate pumpkin is ready to be displayed! You can hang it on the wall, refrigerator, or bulletin board for some festive Halloween fun.
This craft is super easy and safe for toddlers, allowing them to get creative while improving their motor skills.
Looking for the perfect crayons to bring these Halloween paper crafts to life? Over 3,000 families and teachers picked up these Crayola Crayons Bulk for kids/classroom (24 Packs) last month, and they’ve been a favorite!
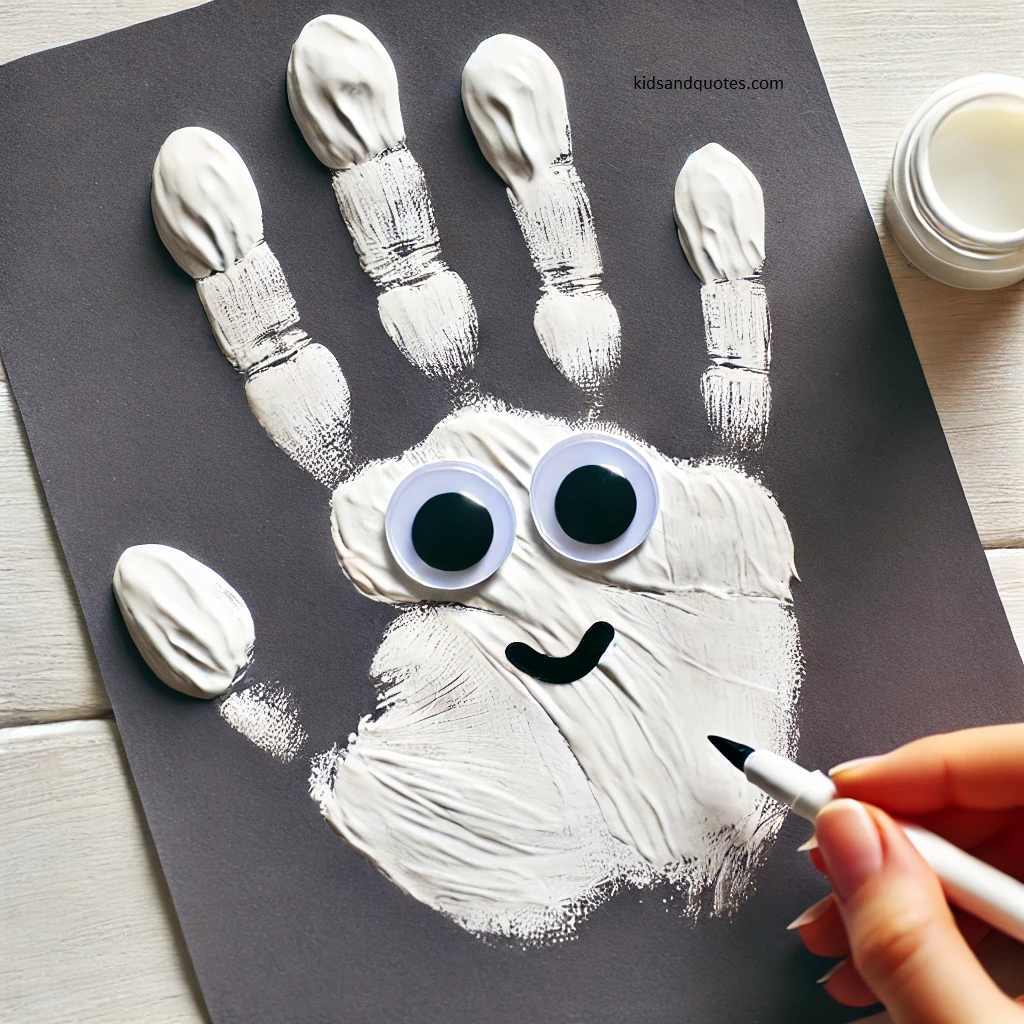
Handprint Ghost
Materials needed
- White Paint (washable, child-safe)
- Black Marker (or crayon)
- Googly Eyes (optional, but fun!)
- Construction Paper (any color for the background, like black or purple)
- Glue Stick (for attaching googly eyes)
- Paintbrush or Sponge (to spread paint)
Instructions
Create the ghost handprint:
- Help your toddler cover the palm of their hand with white paint using a paintbrush or sponge. Make sure the paint is evenly spread but not too thick.
- Press their hand down on the construction paper (fingers spread slightly) to make a ghost shape. Lift the hand gently to reveal the print.
- Let the paint dry for a few minutes.
Add the eyes and mouth:
- Once the handprint is dry, glue two googly eyes at the top of the palm for the ghost’s eyes.
- Use a black marker or crayon to draw a small mouth. You can make it friendly or spooky, depending on what your toddler likes!
Display the ghost:
- Once complete, you can cut out the ghost shape (optional) or leave it on the construction paper. Hang it up around the house or classroom to show off your toddler’s Halloween creation!
This craft is perfect for little ones, helping them improve their fine motor skills while getting into the Halloween spirit!
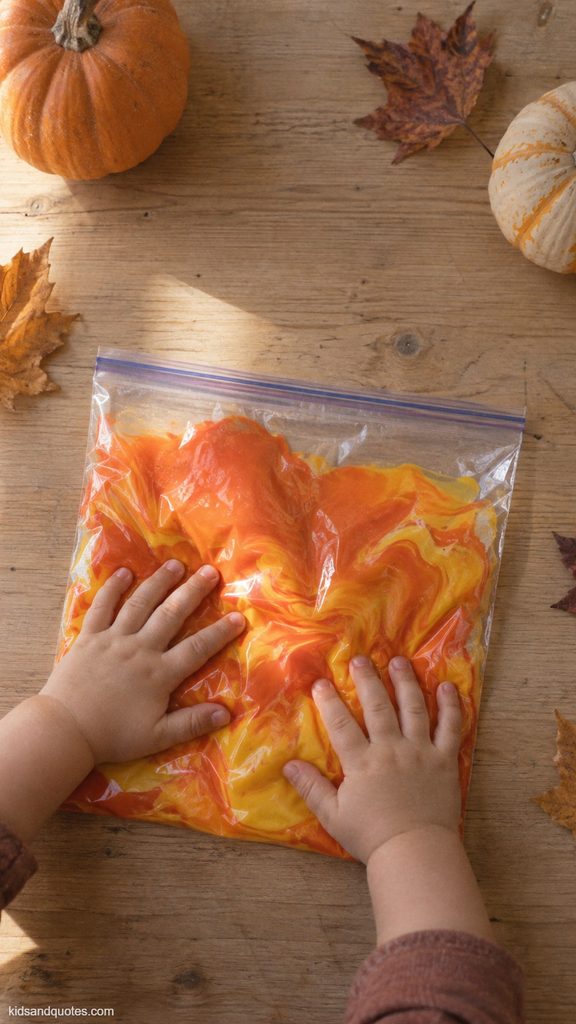
Squish-Bag Pumpkin Patch
Materials needed
- Quart-size ziplock bag
- Orange washable paint
- Small squeeze of yellow washable paint
- Packing tape (to reinforce the seal)
- Black permanent marker (adult use only, on the outside of the bag)
- Damp cloth for cleanup
Instructions
Prep the bag:
- Squeeze a dollop of orange and a smaller dollop of yellow paint into the ziplock bag.
- Press out excess air and seal tightly, then reinforce the seam with packing tape so nothing leaks.
Squish and mix:
- Let your toddler press and squish the bag with their palms and fingers, blending the colors into a pumpkin-orange swirl.
Draw the face:
- Once they’re happy with the mix, use a permanent marker on the outside of the bag to draw a jack-o’-lantern face (this step is for adults).
Display:
- Tape the bag to a sunny window so light shines through the colors, or leave it flat on the table as a mess-free busy mat.
This craft is a completely mess-free way for toddlers to explore color mixing while building hand strength.
Footprint Bat Family
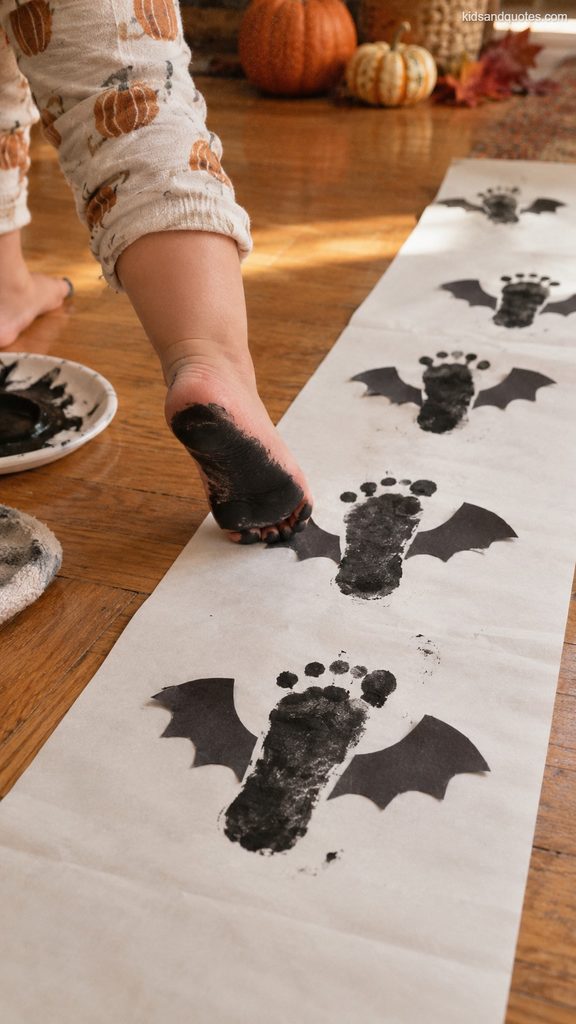
Materials needed
- Black washable paint
- Paintbrush or sponge
- White cardstock or construction paper
- Black marker
- Baby wipes for cleanup
Instructions
Paint the foot:
- Brush black paint evenly onto the sole of your toddler’s foot.
Press the print:
- Press the foot firmly onto paper with toes spread slightly, so the toes form bat wings and the heel forms the body.
Repeat in sizes:
- Make a few prints in a row to build a “family” of bats from smallest to largest.
Add details:
- Once dry, draw two small ears, eyes, and a smile on each bat with a marker.
This is a keepsake craft that quietly sneaks in size-sequencing practice for little ones.
Pom-Pom Pumpkin Patch Drop
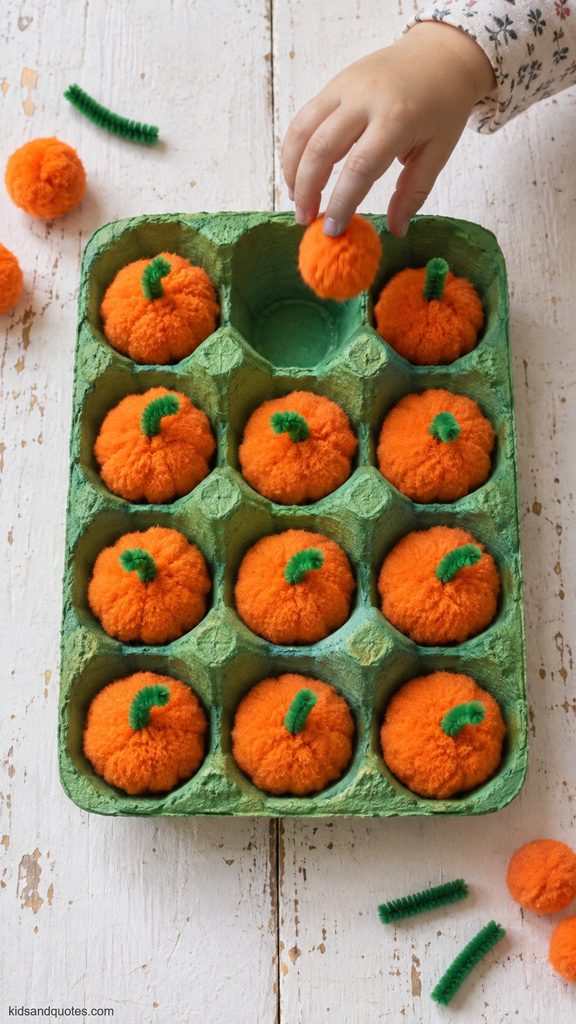
Materials needed
- Orange pom-poms (assorted sizes)
- Empty egg carton, painted green (the “patch”)
- Toddler-safe tongs or scoop (optional)
- Green pipe cleaner pieces (optional, for stems)
Instructions
Set the scene:
- Place the green-painted egg carton on the table as the “pumpkin patch.”
Drop and count:
- Hand your toddler orange pom-poms one at a time, encouraging them to drop one into each cup while you count aloud together.
Add stems:
- Once every cup is filled, help your toddler push a small piece of green pipe cleaner into each pom-pom as a stem.
Dump and repeat:
- Let your toddler dump the carton out and start again… this activity is designed to be played over and over.
This one hides counting, sorting, and pincer-grasp practice inside simple repetitive play.
Cotton Ball Ghost Poke
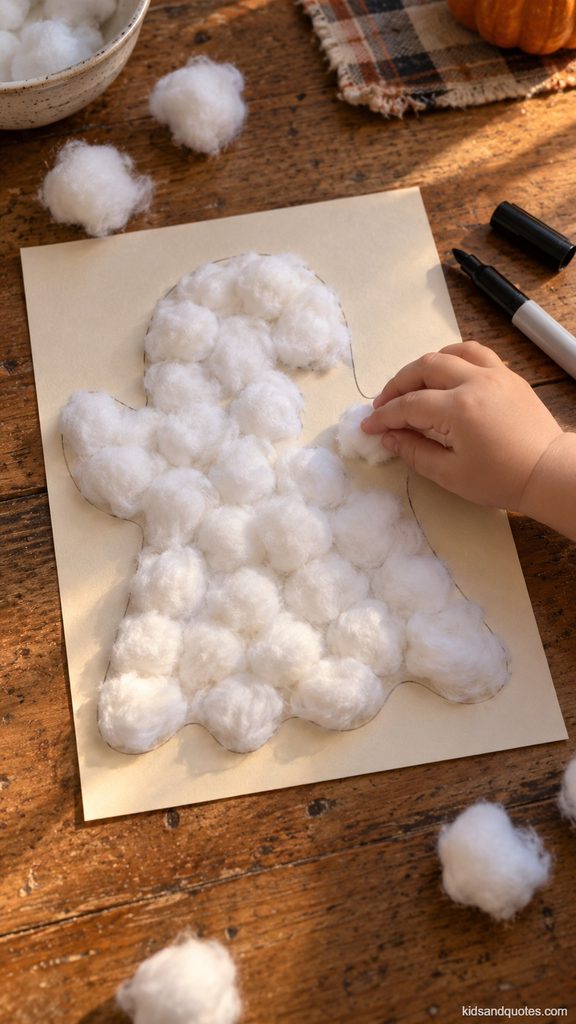
Materials needed
- White cardstock with a ghost outline pre-drawn
- Cotton balls, torn into small pieces
- Glue stick or washable glue in a shallow dish
- Golf tee or toddler-safe blunt poker
- Black marker for the face
Instructions
Prep the outline:
- Draw or print a large, simple ghost shape on cardstock ahead of time.
Tear and dip:
- Tear cotton balls into small tufts and let your toddler dip each piece lightly in glue.
Poke and place:
- Using a golf tee or their fingers, have your toddler poke and press each tuft onto the ghost outline until it’s fully covered.
Add a face:
- Once dry, draw two simple eyes and a mouth on the ghost.
The repetitive poking and pinching motion here builds the same muscles kids will later use for pencil grip.
Candy Corn Fingerprint Trio
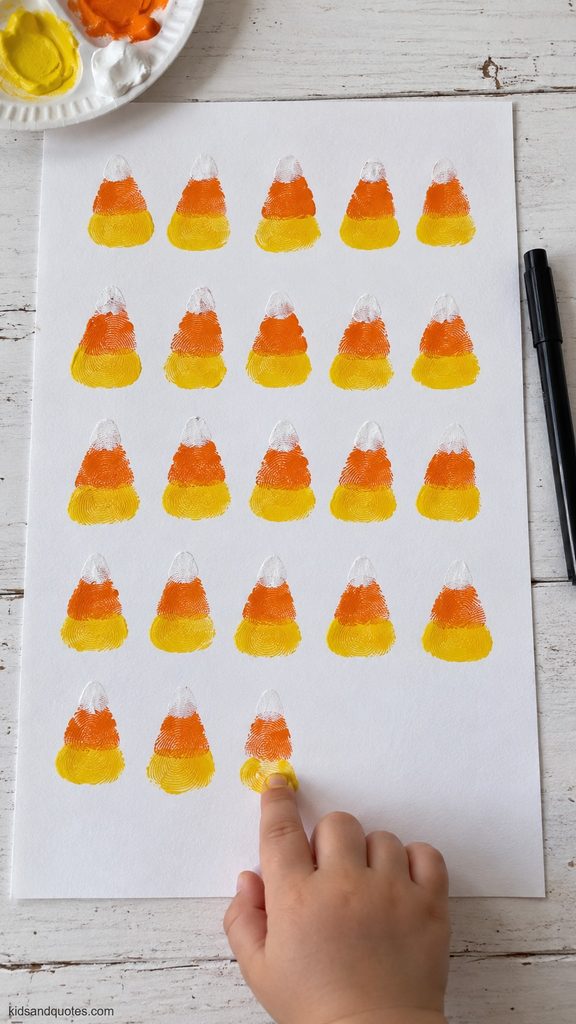
Materials needed
- Yellow, orange, and white washable paint in shallow dishes
- White cardstock
- Black fine-tip marker
- Wet wipes
Instructions
Stack the colors:
- Dip your toddler’s fingertip in yellow paint and press it near the bottom of the paper, then orange just above it, then white at the very top, aligning the three prints to form a candy corn shape.
Repeat in rows:
- Make several candy corn shapes across the page.
Outline once dry:
- Use a black marker to lightly outline each candy corn shape for definition.
Turn into cards:
- Cut out individual candy corns and glue onto folded cardstock to make instant greeting cards.
A five-minute craft that turns into a Halloween card for grandparents with almost no cleanup.
Halloween craft ideas for preschoolers
Bat Hat
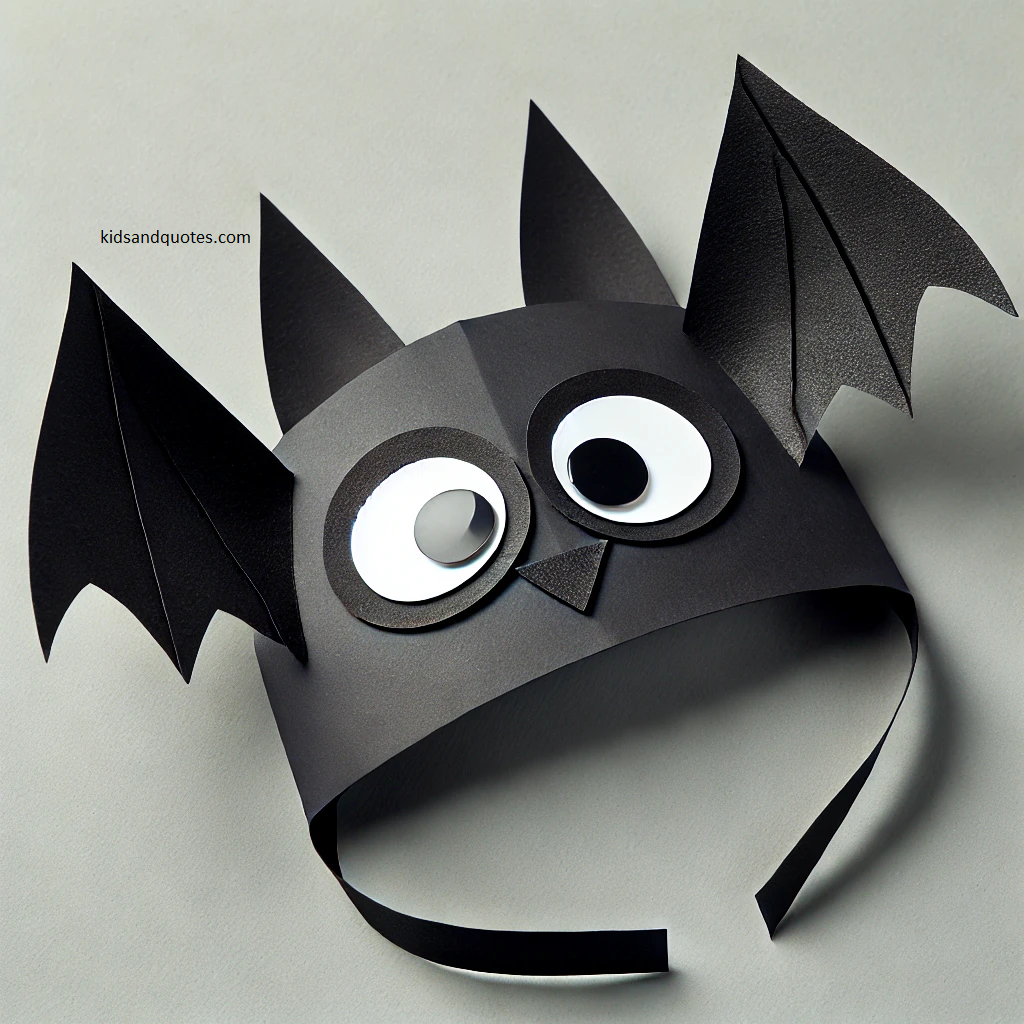
Materials needed
- Black Construction Paper
- Googly Eyes (optional, can also draw eyes)
- Glue Stick
- Scissors (child-safe)
- White Crayon or Marker (to draw the smile)
- Tape or Stapler (to assemble the headband)
Instructions
Make the headband:
- Cut a long strip of black construction paper, about 2 inches wide. This will be the headband part of the hat.
- Wrap it around your preschooler’s head to size it, and either tape or staple the ends together to form a circle that fits comfortably.
Create the bat wings:
- Cut out two bat wings from the black construction paper. To make it easier, you can fold the paper and cut both wings at the same time, using simple curves to shape the edges.
- Glue the wings to each side of the headband.
Add the eyes and smile:
- Stick two googly eyes (or draw eyes with a white crayon/marker) on the front of the headband.
- Use a white crayon or marker to draw a friendly smile under the eyes to give the bat a playful look.
Wear the bat hat:
- Once everything is assembled and dry, your preschooler can proudly wear their bat hat and flutter around like a friendly Halloween bat!
This Bat Hat craft is simple, fun, and perfect for little ones to get into the Halloween spirit!
Ghost Paper Chain
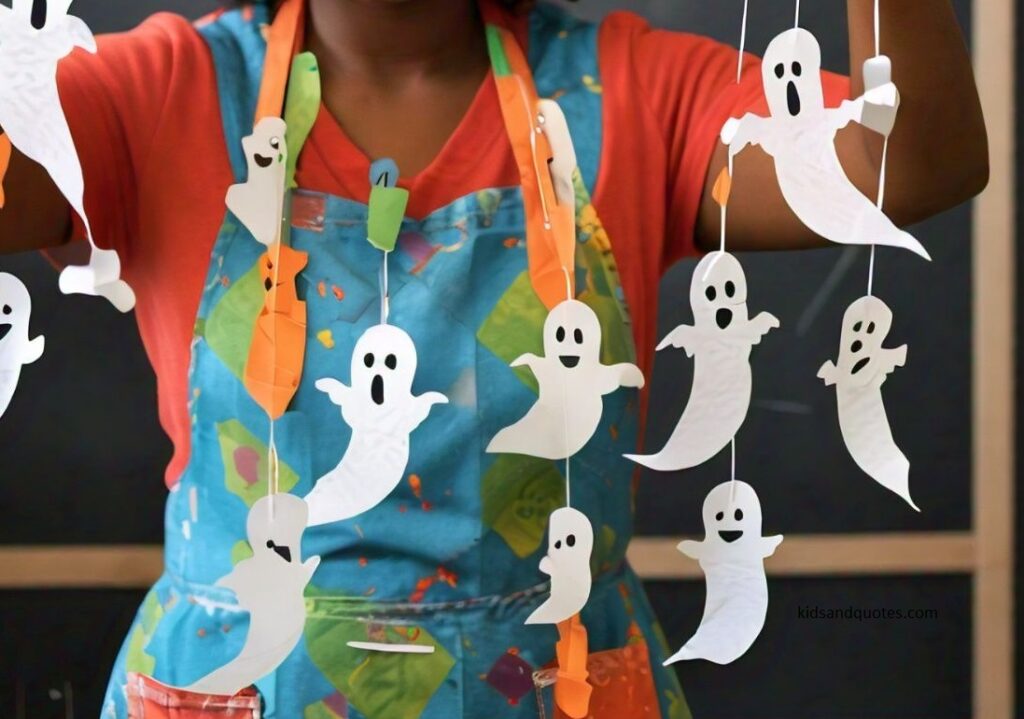
Materials needed
- White Construction Paper or Regular White Paper
- Black Marker (for drawing faces)
- Scissors (child-safe)
- Glue Stick or Tape (for connecting the chains)
- String or yarn (optional, for hanging)
- Googly Eyes (optional, to make the ghosts more playful)
Instructions
Cut paper strips:
- Start by cutting the white paper into long, narrow strips (about 1 inch wide). These will form the links of your paper chain. Cut enough strips to create the desired length for your ghost chain.
Create the paper chain:
- Form each strip into a loop, overlapping the ends slightly and gluing or taping them together to make a circle.
- Link each new strip through the previous one before gluing or taping, creating a connected chain.
Cut ghost shapes:
- Cut small, simple ghost shapes from white paper. You can draw basic ghost outlines (like ovals with wavy bottoms) and then cut them out. Each ghost should be about 3-4 inches tall.
- If you want to add more fun, you can glue on googly eyes instead of drawing them.
Draw faces:
- Use the black marker to draw friendly or spooky faces on each ghost. Let your preschoolers get creative with different expressions—some can be happy, surprised, or even scared!
Attach the ghosts:
- Glue or tape each ghost to one of the links in your paper chain. You can alternate between plain loops and ghost loops to make the chain more playful.
Optional: Add String:
- If you’d like to hang your ghost chain from the ceiling or a doorway, attach a piece of string or yarn to one end of the chain for easy hanging.
Your ghost paper chain is now ready to be displayed as a fun Halloween decoration! This craft is simple, safe, and perfect for preschoolers to enjoy while developing their fine motor skills.
Egg Carton Creepy Crawly Spiders
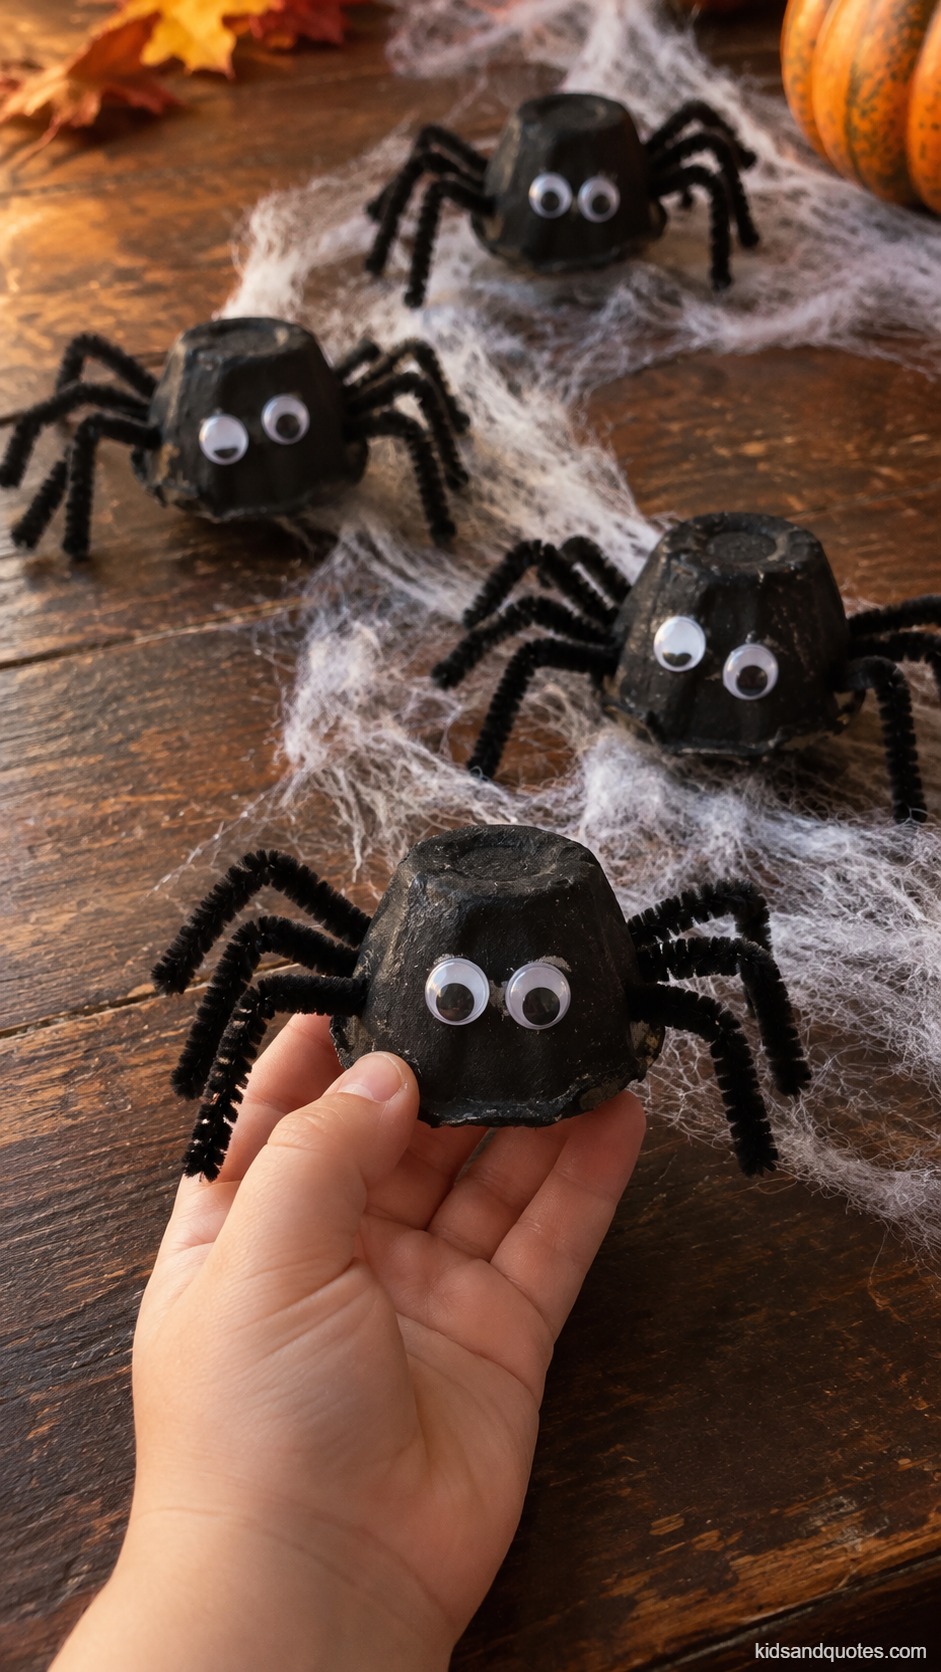
Materials needed
- Cardboard egg carton
- Black paint
- Paintbrush
- Scissors (adult use, for cutting cups)
- Black pipe cleaners (8 per spider)
- Googly eyes
- Glue
Instructions
Cut and paint:
- Cut individual cups from the egg carton and paint each one black; let dry.
Add legs:
- Poke four pipe cleaners through each side of the cup (eight total) and bend to shape spider legs.
Attach eyes:
- Glue two googly eyes to the front of each spider body.
Count together:
- As you attach the legs, count all eight aloud with your preschooler.
This turns a recycled carton into both a tactile counting lesson and a classic Halloween decoration.
Toilet Paper Roll Black Cat Family
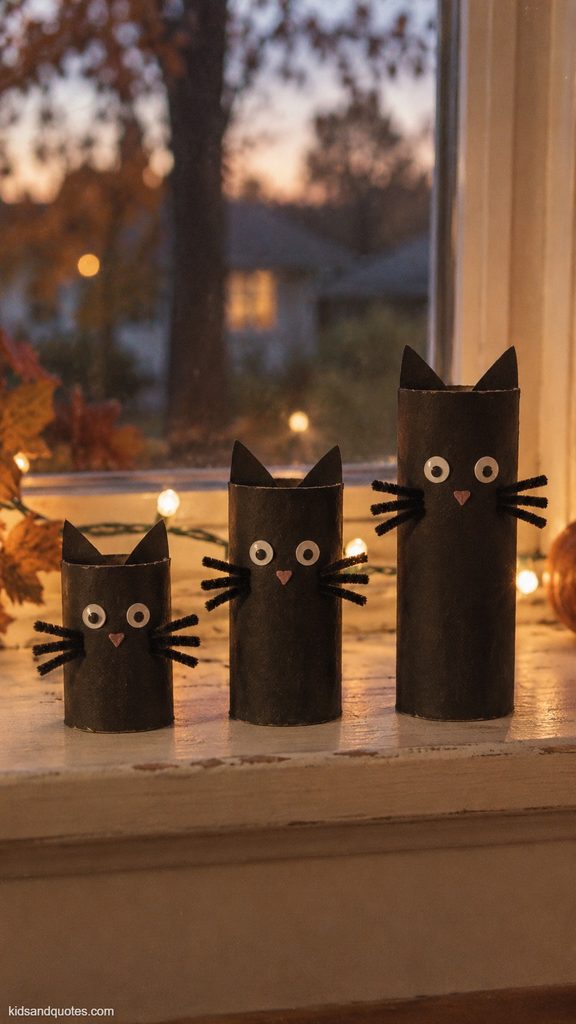
Materials needed
- Empty toilet paper rolls (3 different lengths, trimmed)
- Black construction paper
- Glue stick
- White and pink construction paper scraps
- Black pipe cleaners (whiskers)
- Scissors
Instructions
Wrap the rolls:
- Cover each toilet paper roll completely in black construction paper.
Cut the features:
- Cut small triangle ears, oval eyes, a pink nose, and a mouth from paper scraps.
Assemble the face:
- Glue the features onto each roll to create a cat face, gluing pipe-cleaner whiskers on last.
Line them up:
- Stand the three cats in a row from smallest to largest for a “cat family” display.
A simple assembly craft that naturally introduces sequencing and size comparison.
Paper Plate Spiderweb Lacing Card
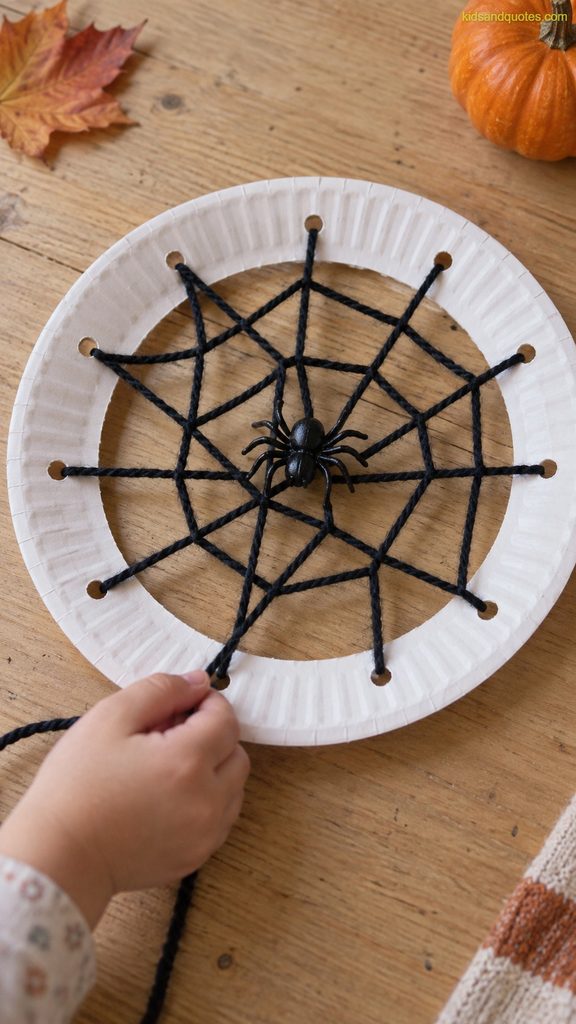
Materials needed
- White paper plate
- Hole punch
- Black or white yarn
- Plastic lacing needle, or tape the end of the yarn
- Black marker
- Small plastic spider ring (optional)
Instructions
Punch the holes:
- Punch 10–12 evenly spaced holes around the rim of the paper plate.
Draw the guide:
- Lightly draw web lines from the center to each hole as a lacing guide.
Lace the web:
- Help your preschooler thread yarn in and out of the holes, following the drawn lines, from the outer edge toward the center.
Add a spider:
- Tape or tie a small plastic spider to the finished web.
Builds hand-eye coordination through the same in-and-out motion kids will use later for shoe-tying.
Pinecone Night Owls
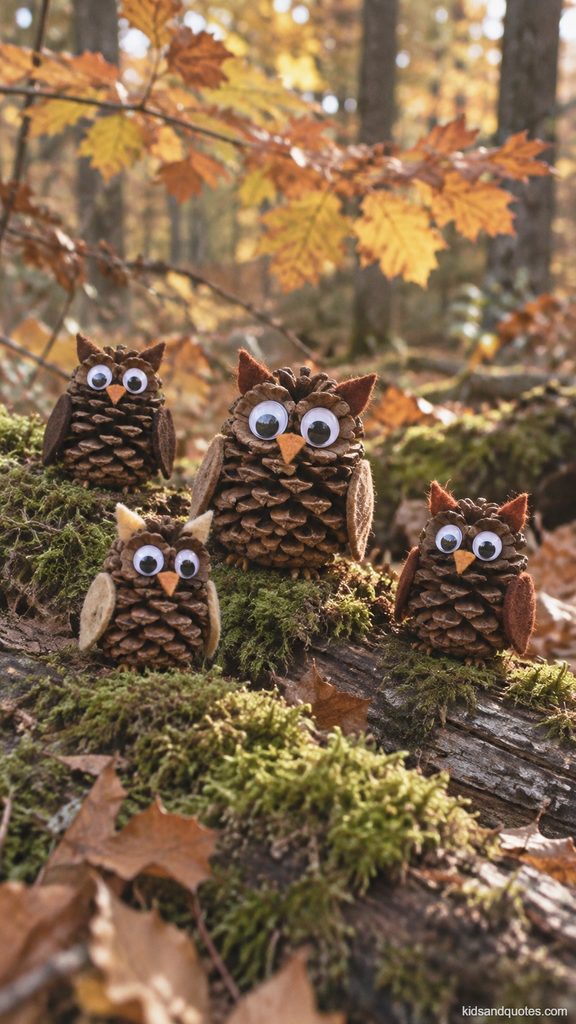
Materials needed
- Pinecones (collected on a nature walk)
- Brown and orange felt scraps
- Googly eyes
- Strong craft glue (or hot glue, adult use)
- Scissors
Instructions
Gather and clean:
- Collect a few dry, open pinecones on a walk together.
Cut the features:
- Cut small felt triangles for ears and an orange diamond for the beak.
Glue it together:
- Glue the felt ears to the top of the pinecone, the beak below, and googly eyes above the beak.
Perch the owls:
- Display the finished owls on a shelf, mantel, or in a small centerpiece bowl.
Combines outdoor exploration with a keepsake craft… no paint or mess required.
Marshmallow Ghost Skewers
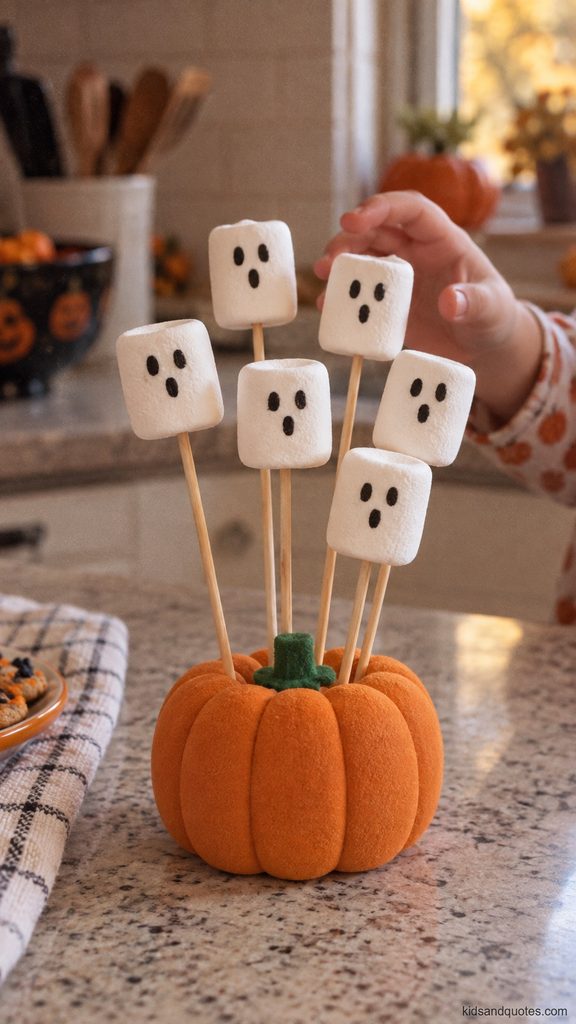
Materials needed
- Large marshmallows
- Wooden skewers or lollipop sticks
- Black edible marker (or melted chocolate in a piping bag)
- Small plate or foam block for standing skewers upright
Instructions
Thread the marshmallows:
- Slide 2–3 marshmallows onto each skewer.
Draw the faces:
- Use the edible marker (or a toothpick dipped in melted chocolate) to draw simple ghost faces on each marshmallow.
Arrange and serve:
- Stand the skewers upright in a small foam block, or lay them on a platter for a Halloween party snack.
Snack while crafting:
- Let kids draw their own faces for a craft-and-treat activity in one.
A five-minute edible craft that doubles as the easiest Halloween party snack on this list.
Halloween craft ideas for elementary school kids
Pumpkin Patch of Kindness
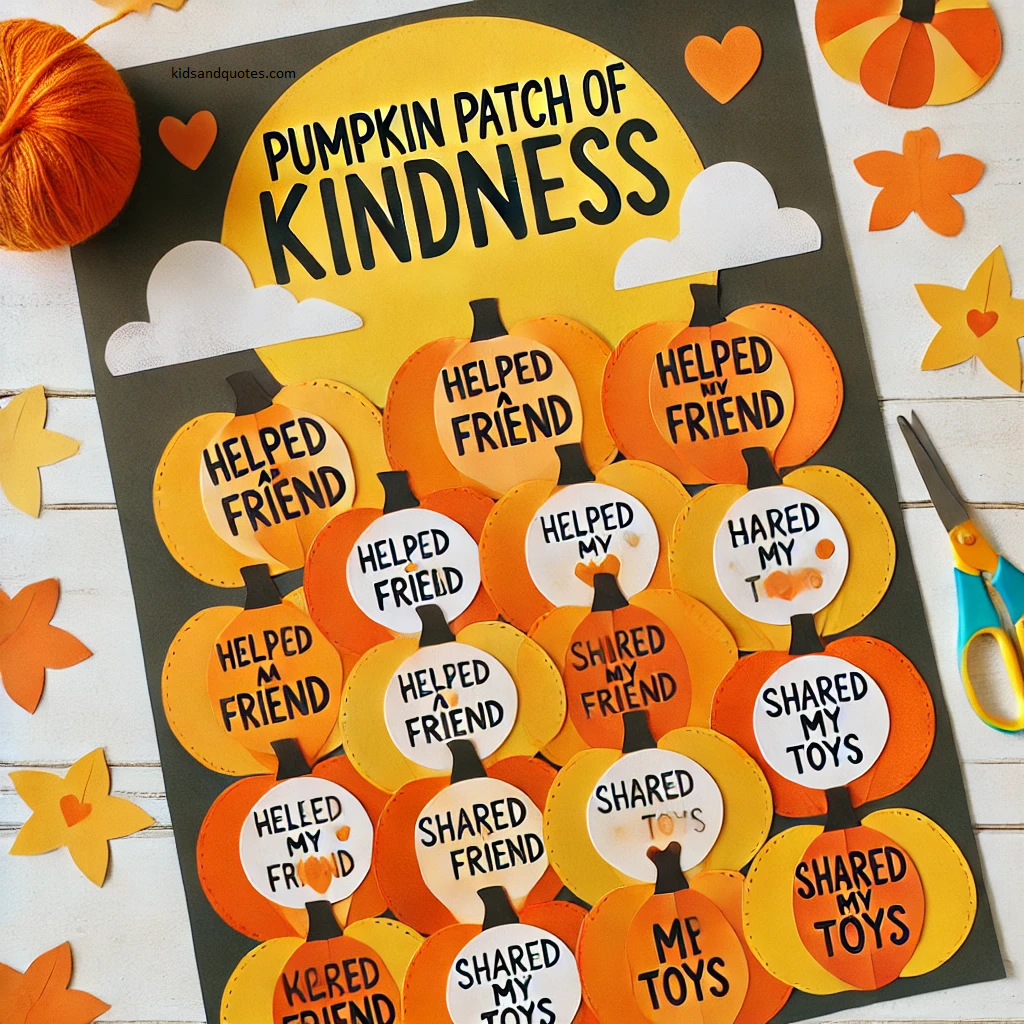
Materials needed
- Orange, Yellow, and Green Construction Paper (for pumpkins and stems)
- Scissors (child-safe)
- Glue Stick
- Black Marker (for writing kind deeds)
- Poster Board or a Large Sheet of Paper (for the pumpkin patch background)
- Optional: Stickers or additional decorations like leaves or vines
Instructions
Cut out pumpkins:
- Start by cutting out pumpkin shapes from the orange and yellow construction paper. You can make them in different sizes for variety.
- Cut out small green rectangles or leaf shapes from the green construction paper to serve as the pumpkin stems.
Write acts of kindness:
- Have the kids think about a kind act they’ve done or want to do. It could be as simple as “helped a friend” or “shared my toys.”
- Use the black marker to write each act of kindness on a pumpkin. Encourage them to fill the pumpkin with thoughtful deeds!
Assemble the pumpkin patch:
- Once all the pumpkins are ready, help the kids glue a stem to the top of each pumpkin.
- Stick or glue the pumpkins onto the poster board or large sheet of paper to create a patch. You can arrange them randomly or in neat rows, depending on how you want the patch to look.
Decorate the patch:
- Add extra decorations like green vines, leaves, or other fall-themed stickers around the pumpkins to make the patch look more colorful and complete.
Display the pumpkin patch of kindness:
- Once all the pumpkins are glued and the patch is decorated, hang it up in the classroom or at home. The pumpkin patch will serve as a great reminder of how small acts of kindness can grow into something bigger!
This craft is perfect for elementary school kids, as it encourages creativity and reflection while also promoting kindness in a fun, fall-themed way.
Spiderweb of Good Deeds
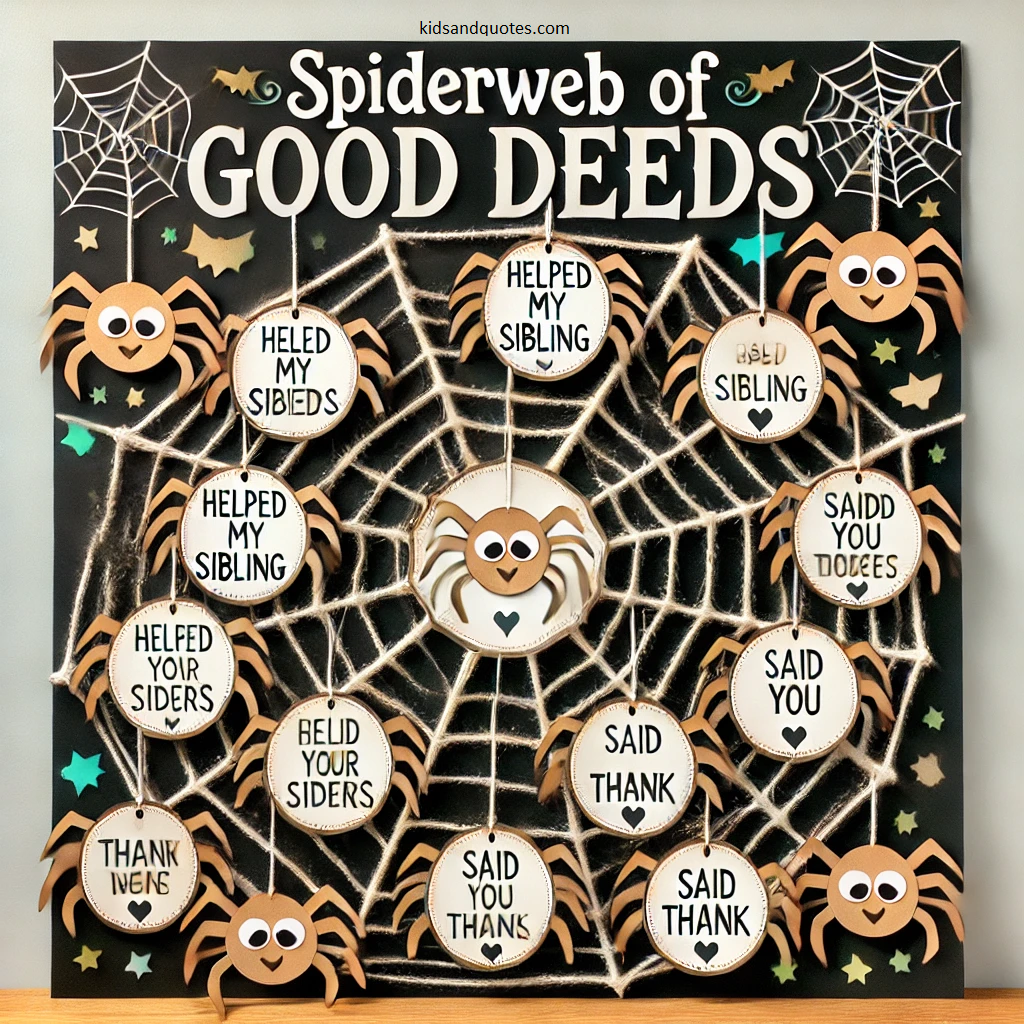
Materials needed
- Black Construction Paper (for the spiderweb)
- String or Yarn (white or gray to make the web)
- Scissors (child-safe)
- Glue Stick or Tape (for attaching the web)
- Small Sticky Notes or Spider Cutouts (to write good deeds on)
- Markers (for writing the good deeds)
- Poster Board (for the background)
Instructions
Create the spiderweb:
- Cut a large circle from the black construction paper to act as the base for the spiderweb.
- Use white or gray string/yarn to create the web pattern. Start by taping or gluing one end of the string in the center, then stretch it outwards to the edges of the circle, taping it down in different spots to form the web structure. Create criss-cross patterns to make the web look complete.
Cut out spiders (or use sticky notes):
- Cut out small spider shapes from construction paper or use spider stickers. You can also use small sticky notes shaped like spiders (or circles) if it’s easier.
Write good deeds:
- Have each student write a good deed they’ve done or plan to do on a spider or sticky note. Encourage them to think of specific acts of kindness like “Helped my friend with homework” or “Shared my lunch.”
Attach the spiders:
- Once the deeds are written, attach the spiders to the web by gluing them to the yarn or paper web. Spread the spiders out evenly so the web looks full and colorful.
Display the spider web of good deeds:
- Once all the spiders are attached, display the poster in the classroom or at home. The spiderweb will serve as a great reminder of how small acts of kindness can weave together to create something positive!
Gratitude Ghost Jar
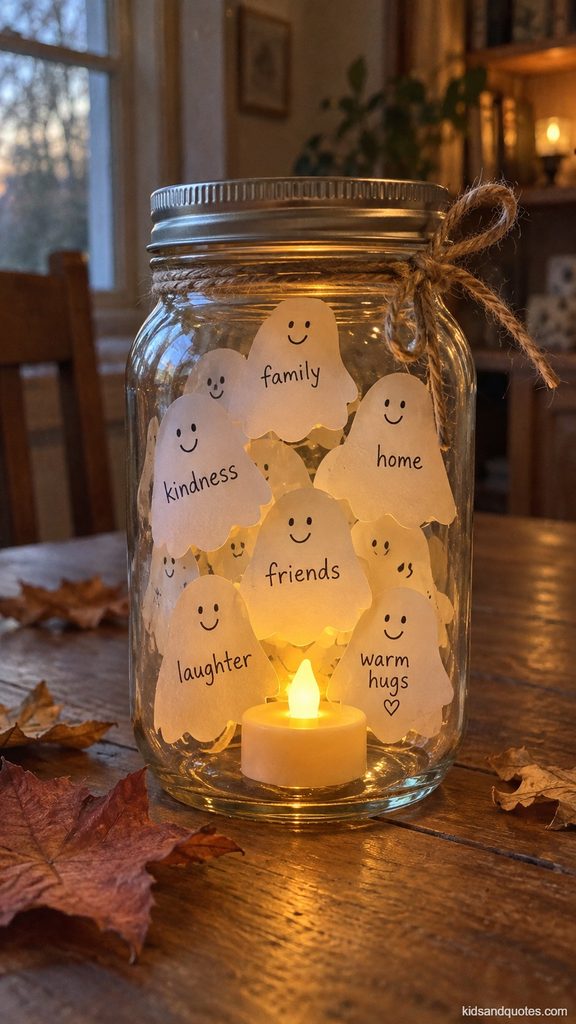
Materials needed
- Small mason jar or clear jar
- White cardstock, cut into mini ghost shapes
- Black marker
- Ribbon or twine
- Battery tea light (optional)
Instructions
Cut the ghosts:
- Cut 8–10 small ghost shapes from white cardstock.
Write it down:
- Have your child write one thing they’re grateful for on each ghost.
Fill the jar:
- Fold or roll each ghost slightly and drop them into the jar until it’s full.
Decorate and display:
- Tie ribbon around the jar lid and set it on a shelf, or drop in a battery tea light for a soft glow at night.
This turns Halloween decor into a running gratitude journal you can revisit all season… a natural bridge into Thanksgiving content.
Kindness Cauldron
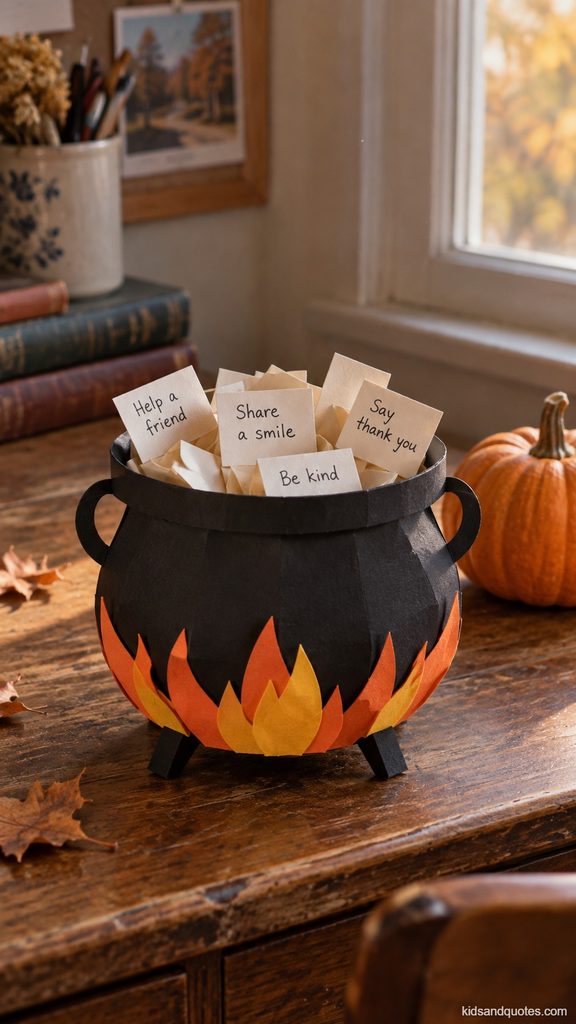
Materials needed
- Black construction paper (or a small black paper bag folded into a cauldron shape)
- Orange and yellow paper strips for “flames”
- Green marker
- Small paper slips
- Glue
Instructions
Build the cauldron:
- Fold and glue black paper into a rounded pocket shape, adding a paper handle.
Add flames:
- Glue orange and yellow paper triangles beneath the cauldron to look like fire.
Write kindness spells:
- On small paper slips, have kids write one kind act each (like “help clean up without being asked”).
Fill the cauldron:
- Fold and drop the “kindness spells” into the cauldron pocket… one to be pulled out and done each day of the week before Halloween.
Recycled Milk Carton Haunted Village
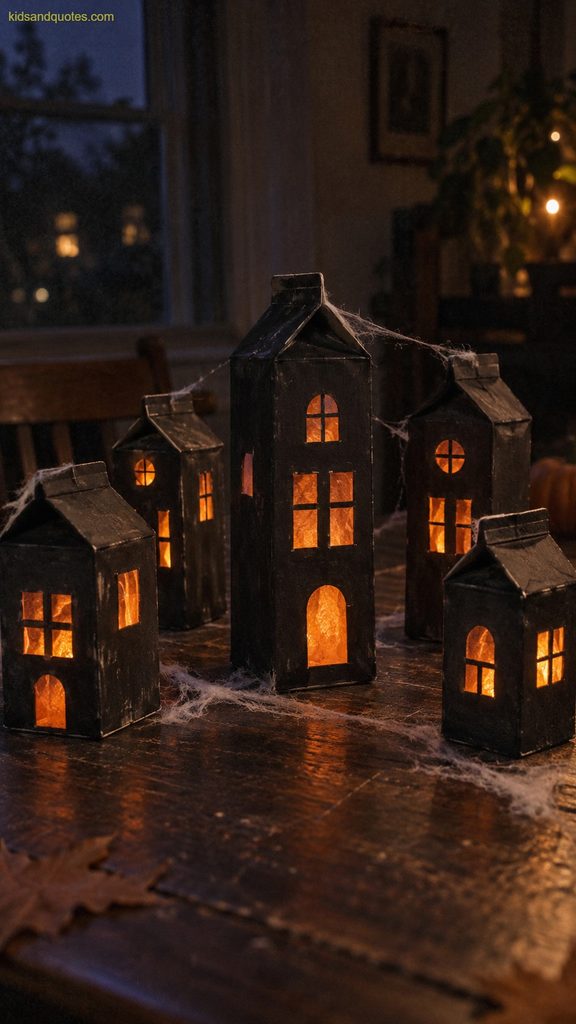
Materials needed
- Clean, empty milk or juice cartons (various sizes)
- Black and gray paint
- Orange and yellow tissue paper (for glowing windows)
- Craft knife (adult use, for cutting windows/doors)
- Battery tea lights or string lights
- Black paper for roof shapes
Instructions
Cut the windows:
- An adult cuts small window and door shapes out of each carton.
Paint the houses:
- Paint the cartons black or dark gray to look like spooky houses; let dry.
Add glowing windows:
- Glue orange or yellow tissue paper behind each window cutout from the inside.
Light it up:
- Place a battery tea light inside each carton and arrange them together as a glowing haunted village at dusk.
An upcycling project that turns recycling bin scraps into the most photographed craft on this list.
Spooky Story Stones
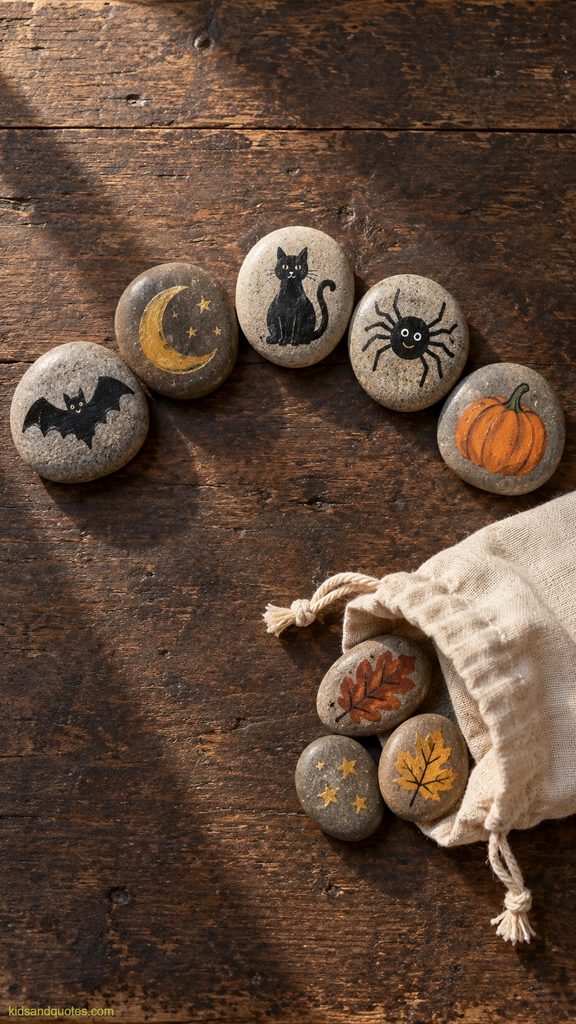
Materials needed
- 8–10 smooth flat river rocks
- Acrylic paint or paint pens
- Clear sealant spray (optional, for durability)
- Small cloth drawstring bag
Instructions
Choose the images:
- Pick 8–10 simple Halloween images to paint, one per stone (bat, moon, cat, spider, pumpkin, ghost, broom, owl).
Paint the stones:
- Paint one image per stone and let dry completely.
Seal for durability:
- Spray with clear sealant so the stones can be reused season after season.
Play the game:
- Store the stones in a drawstring bag, then pull out three or four and take turns building a spontaneous spooky story using each image in order.
Builds storytelling and sequencing skills while giving you screen-free entertainment for car rides and rainy afternoons.
Glow-in-the-Dark Constellation Pumpkin
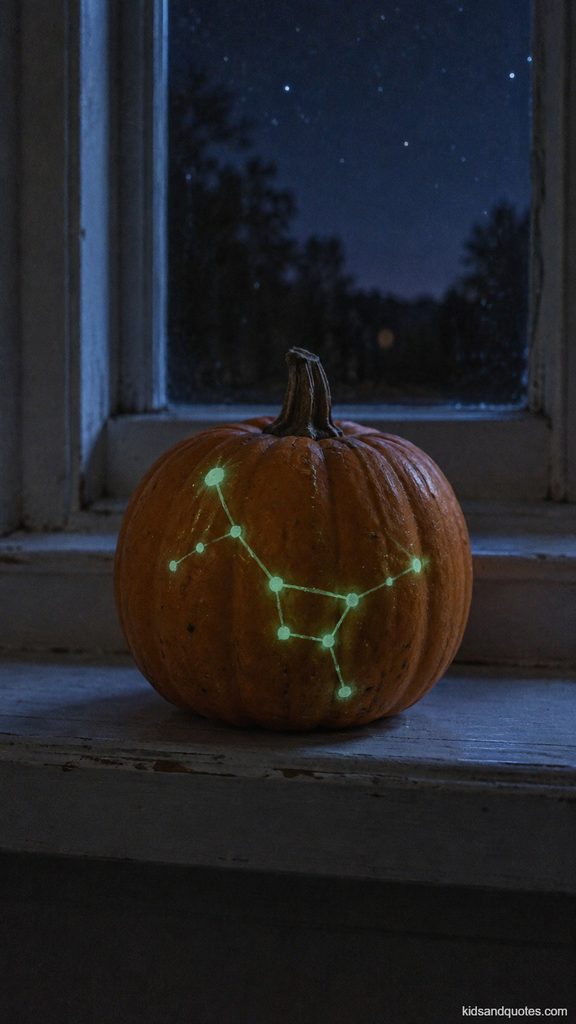
Materials needed
- Small real or foam pumpkin
- Glow-in-the-dark paint pens or paint
- Toothpick or fine paintbrush
- Printed constellation reference (optional)
- Black marker (for daytime guide lines)
Instructions
Pick a constellation:
- Choose a simple constellation (Big Dipper, Orion) to recreate as a reference.
Mark the points:
- Use a toothpick to lightly mark star positions on the pumpkin.
Paint the stars:
- Dot glow-in-the-dark paint at each marked point, connecting them with thin painted lines once dry.
Reveal at night:
- Turn off the lights and watch the constellation glow, then talk about what that constellation is called and where to find it in the real night sky.
Sneaks a real science lesson into a Halloween craft… easily the most “wow” reveal on this whole list.
Get crafty and share the Halloween fun
Halloween is the perfect excuse to get a little crafty, and these Halloween craft ideas will have your kids busy, happy, and maybe even a little messy (in a good way!). From spooky spiders to cute pumpkins, there’s something for every kid to enjoy… no matter their age or skill level.
And the best part? You don’t need anything fancy, just some basic supplies and a whole lot of imagination! So, why not give them a try?
Now, it’s your turn what’s your favorite Halloween craft idea? Drop it in the comments, or share your spooky creations with us!